Hotjar Heatmap analysis: overview and review
If there is one area where WordPress falls a little short, it is analytics. To access critical information about your website, you need to integrate the content management system (CMS) with a third-party service such as Hotjar.
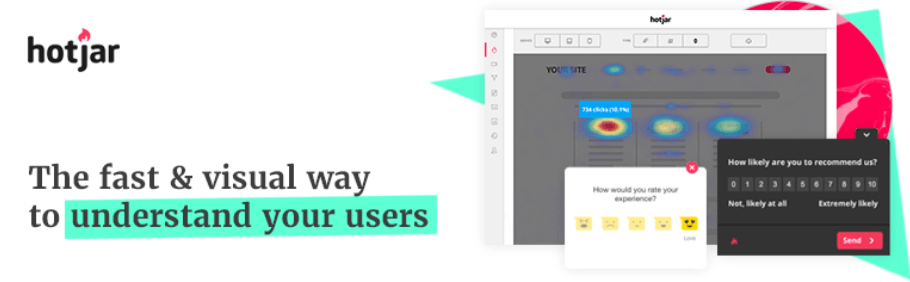
Hotjar is an analytics platform centred on heatmaps. The service allows you to track user behaviour on your website and generate several types of heatmap to display the results.
With Hotjar, you have access to click, movement, and scroll heatmaps that you can switch between with a single click. The platform tracks both desktop and mobile sessions, so you can identify differences in behaviour between the two user groups.
If you want to deepen your understanding of visitor behaviour on your website, Hotjar also records full sessions. This means you can follow users throughout their journey and see precisely what they do at each step. Beyond heatmaps and recordings, Hotjar also lets you analyse form usage on your pages and conduct surveys.
As you might expect, Hotjar is not a free service. To use it, you will need to sign up for a plan on its website and connect it to WordPress via a plugin. Furthermore, to access your heatmaps and recordings, you will need to do so from the Hotjar platform itself.
Key features:
- Analyse user behaviour using three types of heatmap
- Track data for both desktop and mobile sessions
- Record full user sessions and replay them as needed
- Analyse form usage on your pages
- Conduct surveys and polls for your visitors
Pricing: Hotjar offers a free tier for personal use, supporting up to 300 visitor recordings and three different heatmaps. Paid plans start at $29 per month and scale upwards as needed.
How to use Hotjar and add heatmap functionality to your website (in 3 steps)
As you can see, Hotjar offers robust features. Let us focus on its heatmap functionality. Here is how to set up and use this analytics platform.
Step 1: set up a Hotjar account and install the WordPress plugin
The sign-up process is straightforward. You simply select the use case for which you will be using the service, then enter the URL of the website you wish to connect to your account.

Once this is done, you will have access to your Hotjar dashboard. The first thing you will see is a code snippet that you can add to your website in order to connect it to the platform.
![]()
However, if you are using WordPress, you have access to a plugin that can save you from having to add this code manually. For the plugin to work, you will need your Hotjar Site ID, which you can see in the lower right corner of the same screen.
Step 2: get your Hotjar ID and add it to WordPress
At this point, copy your Site ID or keep that Hotjar tab open. Then go to your WordPress dashboard, and install and activate the official Hotjar plugin.
Once the plugin is active, go to the Settings > Hotjar tab and enter your Hotjar ID in the corresponding field.
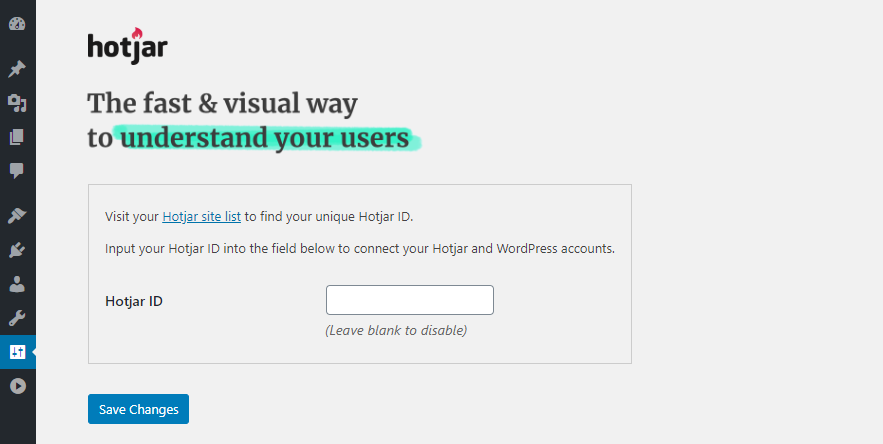
Save your changes and you are ready to use Hotjar! You can now return to Hotjar and access the heatmaps for your pages. Bear in mind, however — you have just set up the service, so it needs a little time and some user data before it can generate useful reports.
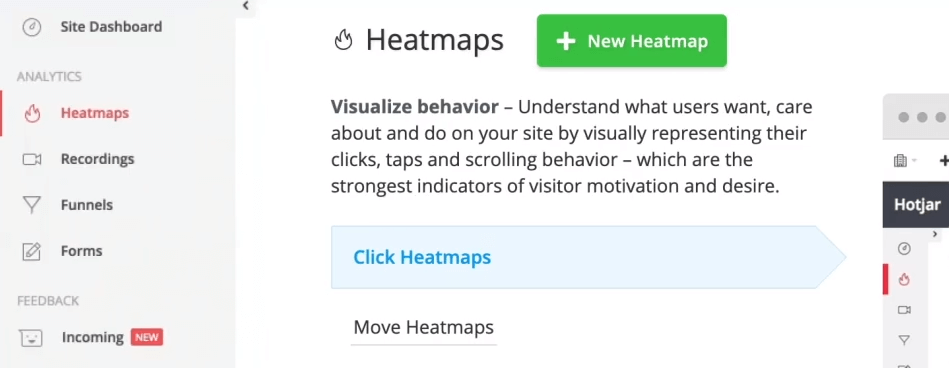
Step 3: access your website's heatmaps
Now that Hotjar has access to your website, return to the service's dashboard. Inside, switch to the Heatmaps tab and click the New Heatmap button.
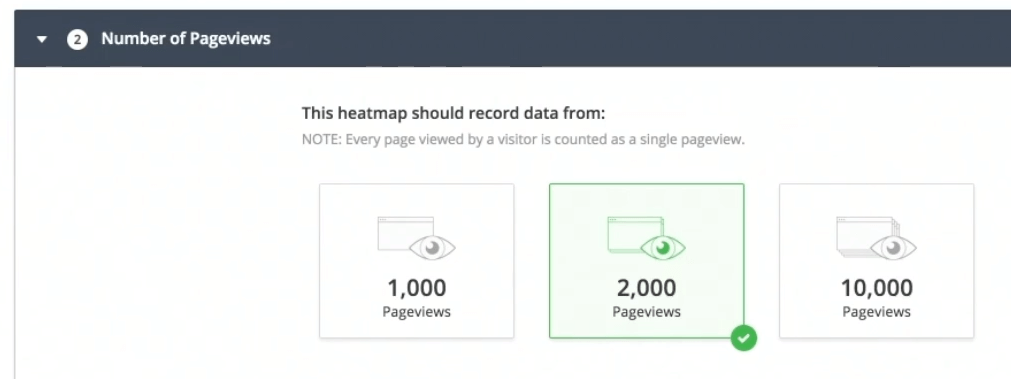
Hotjar asks you to set a name for your heatmap and select the number of page views it should track. With the free plan, you are limited to 1,000 visitors. This is more than enough to provide you with useful insights.
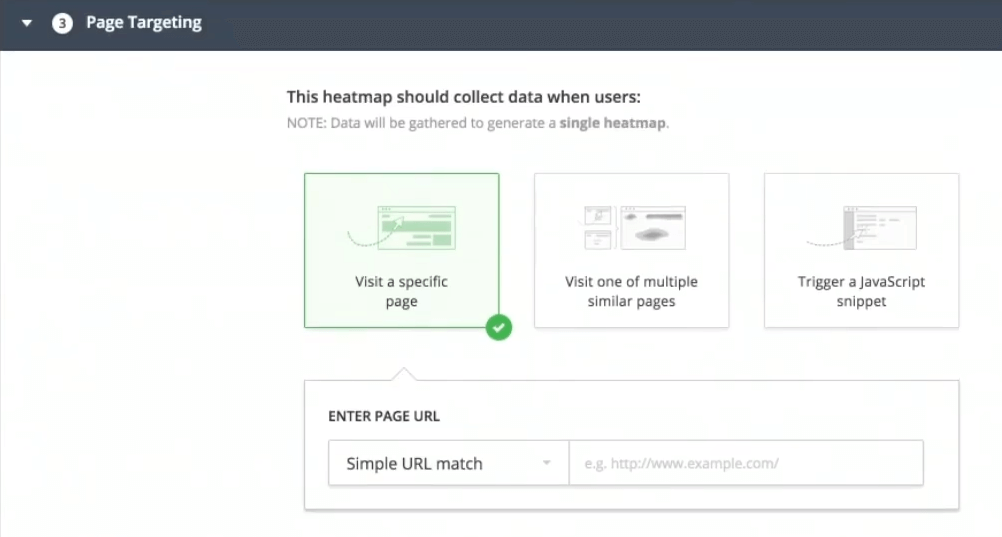
Finally, you can review your heatmap settings and confirm your choices. After that, you simply need to wait a moment for Hotjar to collect enough data to provide you with results.
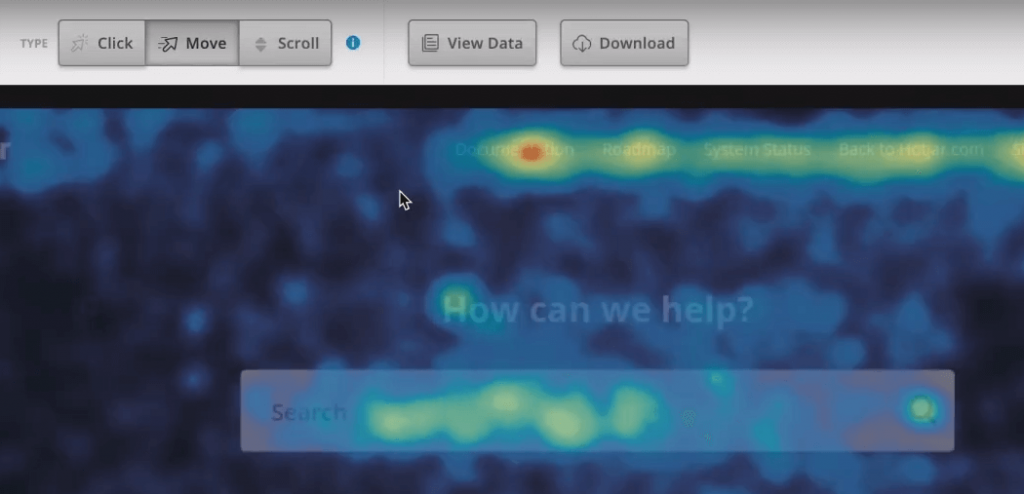
You can access your heatmaps at any time from the Heatmaps tab. Once you have had enough recent visits, you will have plenty to analyse. For example, here is a "movement" heatmap from a test page we set up.
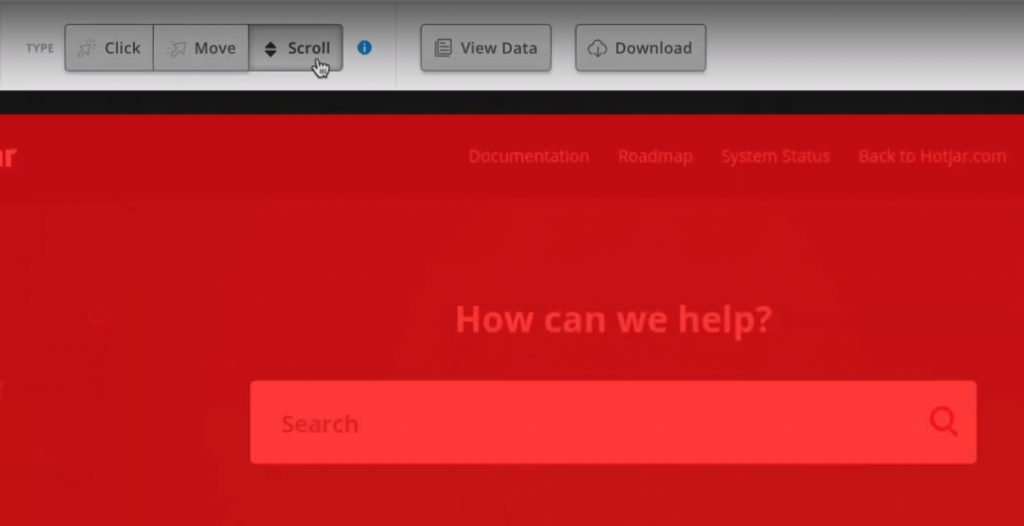
Note that the service lets you switch between heatmap types in a single click. Here, you can see a "scroll" heatmap for the same page:
Once it starts collecting data, all you need to do is monitor it and decide what changes (if any) you wish to make to your site based on the results.
When to use Hotjar versus other heatmap tools
Heatmap tools tend to be either costly or difficult to integrate with WordPress. That is not the case with Hotjar. While the Hotjar free tier offers limited functionality, the reports it provides are detailed enough to act upon. What is more, the service offers an elegant interface that is very easy to navigate.
If you are already using an analytics tool such as Google Analytics, you will be pleased to know that it works well alongside Hotjar. Unfortunately, Google Analytics does not offer a straightforward option for generating heatmaps. However, combining the two services gives you access to a wealth of information about user behaviour without the two being in conflict.
When it comes to WordPress heatmap tools, Hotjar is an easy recommendation for most users. If you would prefer to avoid using a third-party platform, you can look into alternatives such as the Aurora Heatmap plugin.
Conclusion
There are many analytics services and tools you can integrate with WordPress. In almost every case, they rely on third-party platforms to power their features, so you need to make sure you choose the tool that best suits your needs.
Hotjar scores very highly in terms of ease of use, and its free plan is powerful enough for most small to medium-sized websites. What is more, it allows you to generate several types of heatmap and switch between them in seconds, making it an excellent choice for many WordPress users.
Do you have any questions about using Hotjar with WordPress? Let us know in the comments below!
YOU MAY ALSO LIKE
UGC, the future of marketing: How user-generated content can revolutionise your marketing strategy
by Yumea, 7 March 2023
UGC (User Generated Content) is changing the game in the world of marketing. With the rise of social media and content-sharing platforms, the … READ MORE
Category: News , Getting visible online , Social media
Comments: 0
How to use Instagram to reach your audience and drive traffic to your website?
by Yumea, 1 February 2023
Social media has become an indispensable tool for businesses looking to reach their target audience and drive traffic to their website. With more than 3.8 billion active users … READ MORE
Category: Getting visible online , Instagram , Social media
Comments: 0
7 Artificial Intelligence (AI) tools to know in 2023
by Yumea, 12 January 2023
In 2023, there are many websites that use artificial intelligence (AI) to help users write content and generate images. If you are looking for tools to help you write … READ MORE
Category: News
Comments: 0
Have a similar project?
Let's talk it over in 15 minutes. No sales pitch, just a technical chat.