Managing your website
Logging in to the admin area
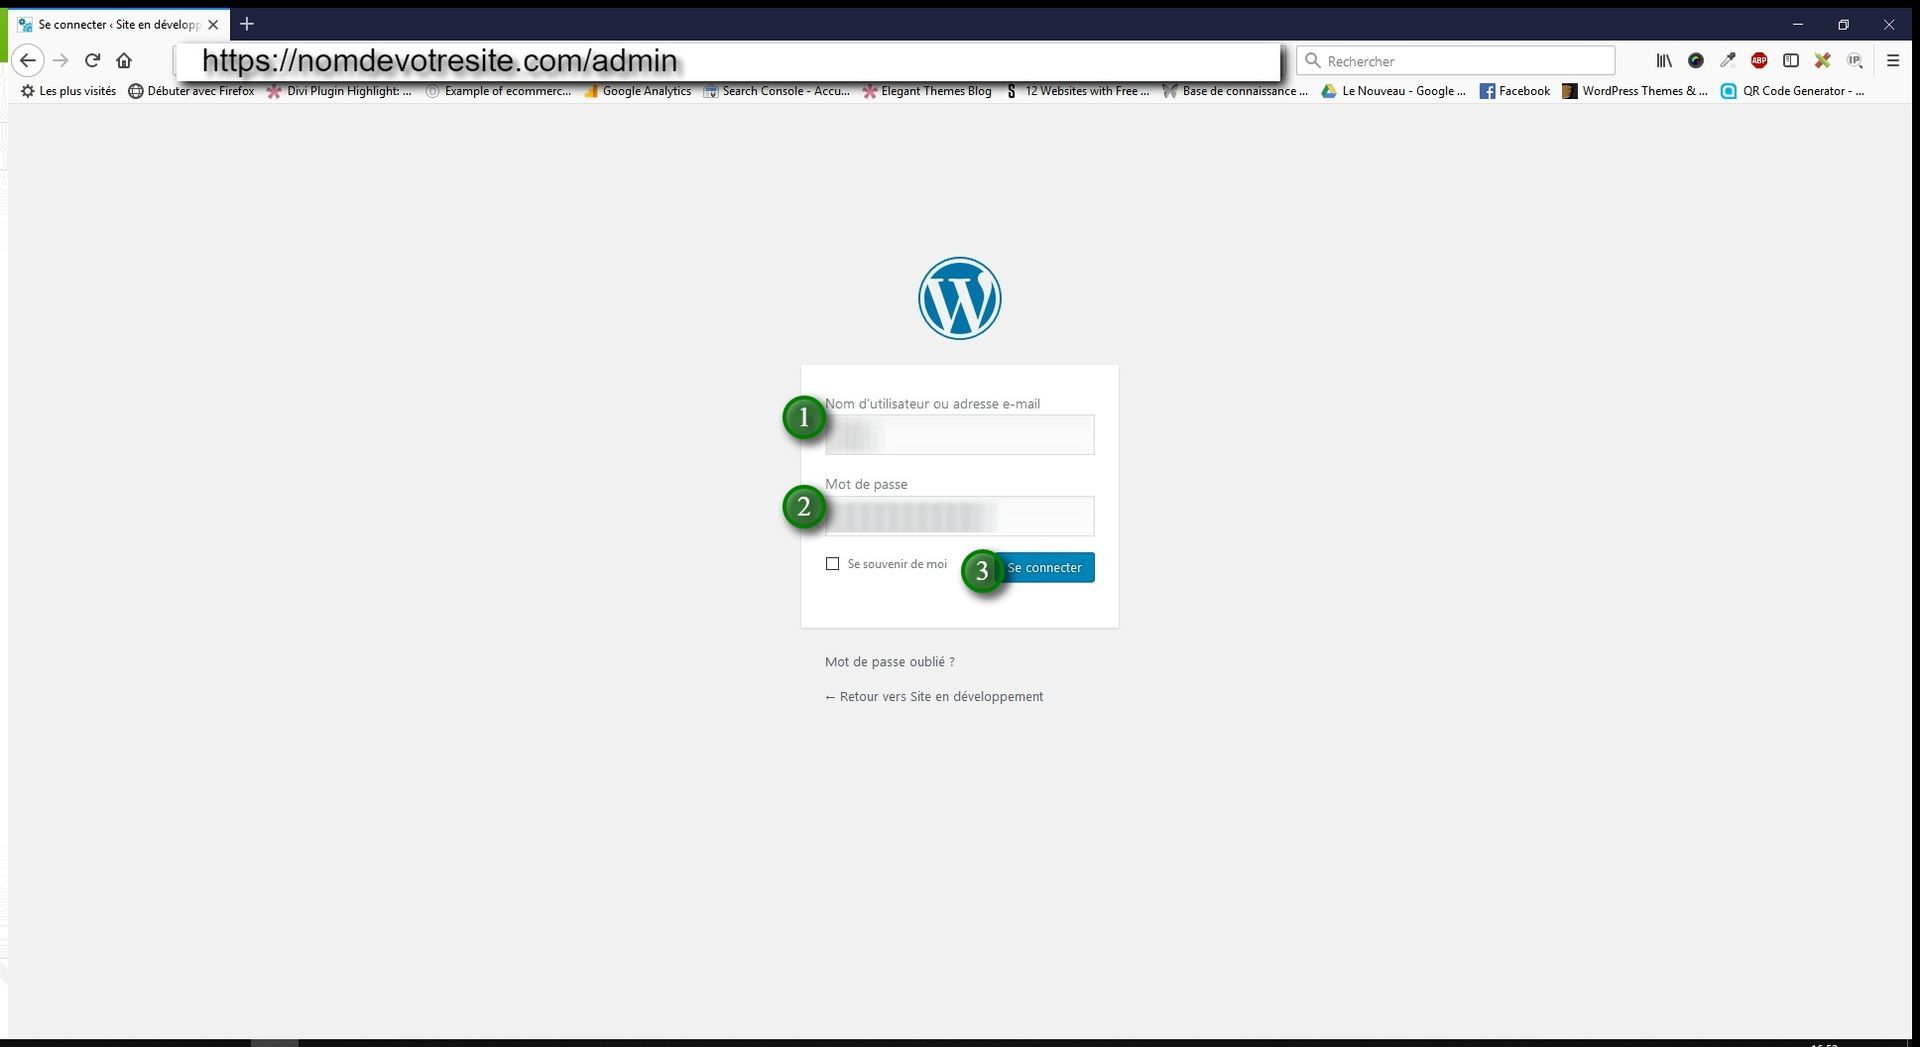
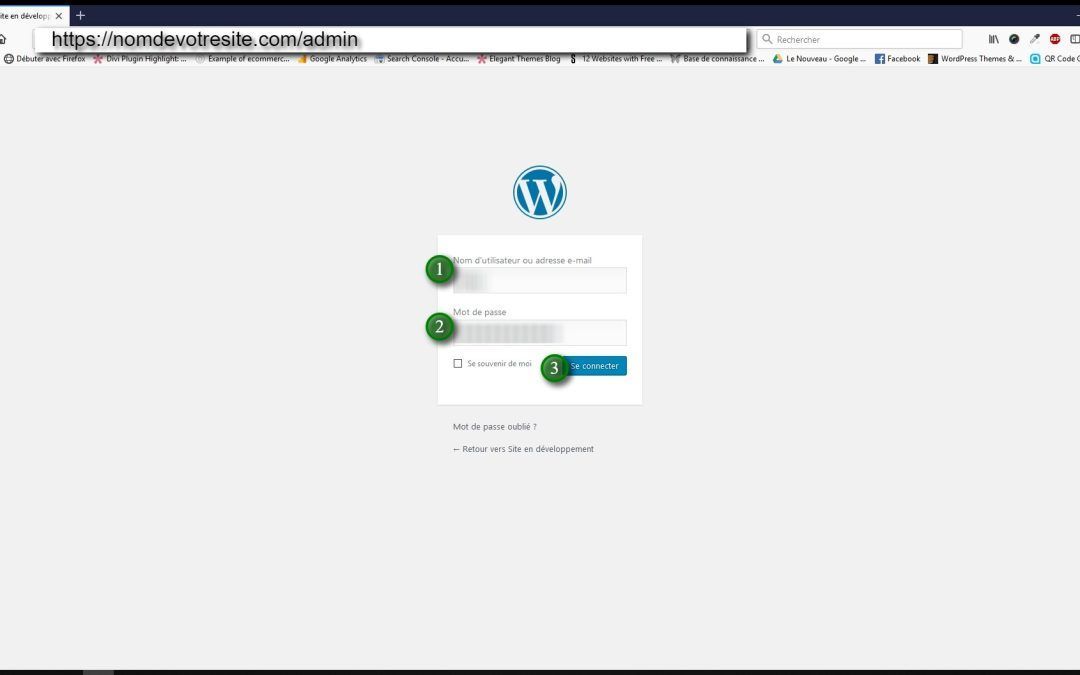
To get started, add /admin or /wp-admin to the end of your website's URL.
Example: www.yourwebsite.com /admin
You will then be taken to a login screen.
1/ 2/ Enter the credentials sent to you by email
3/ Click Log in.
The WordPress dashboard
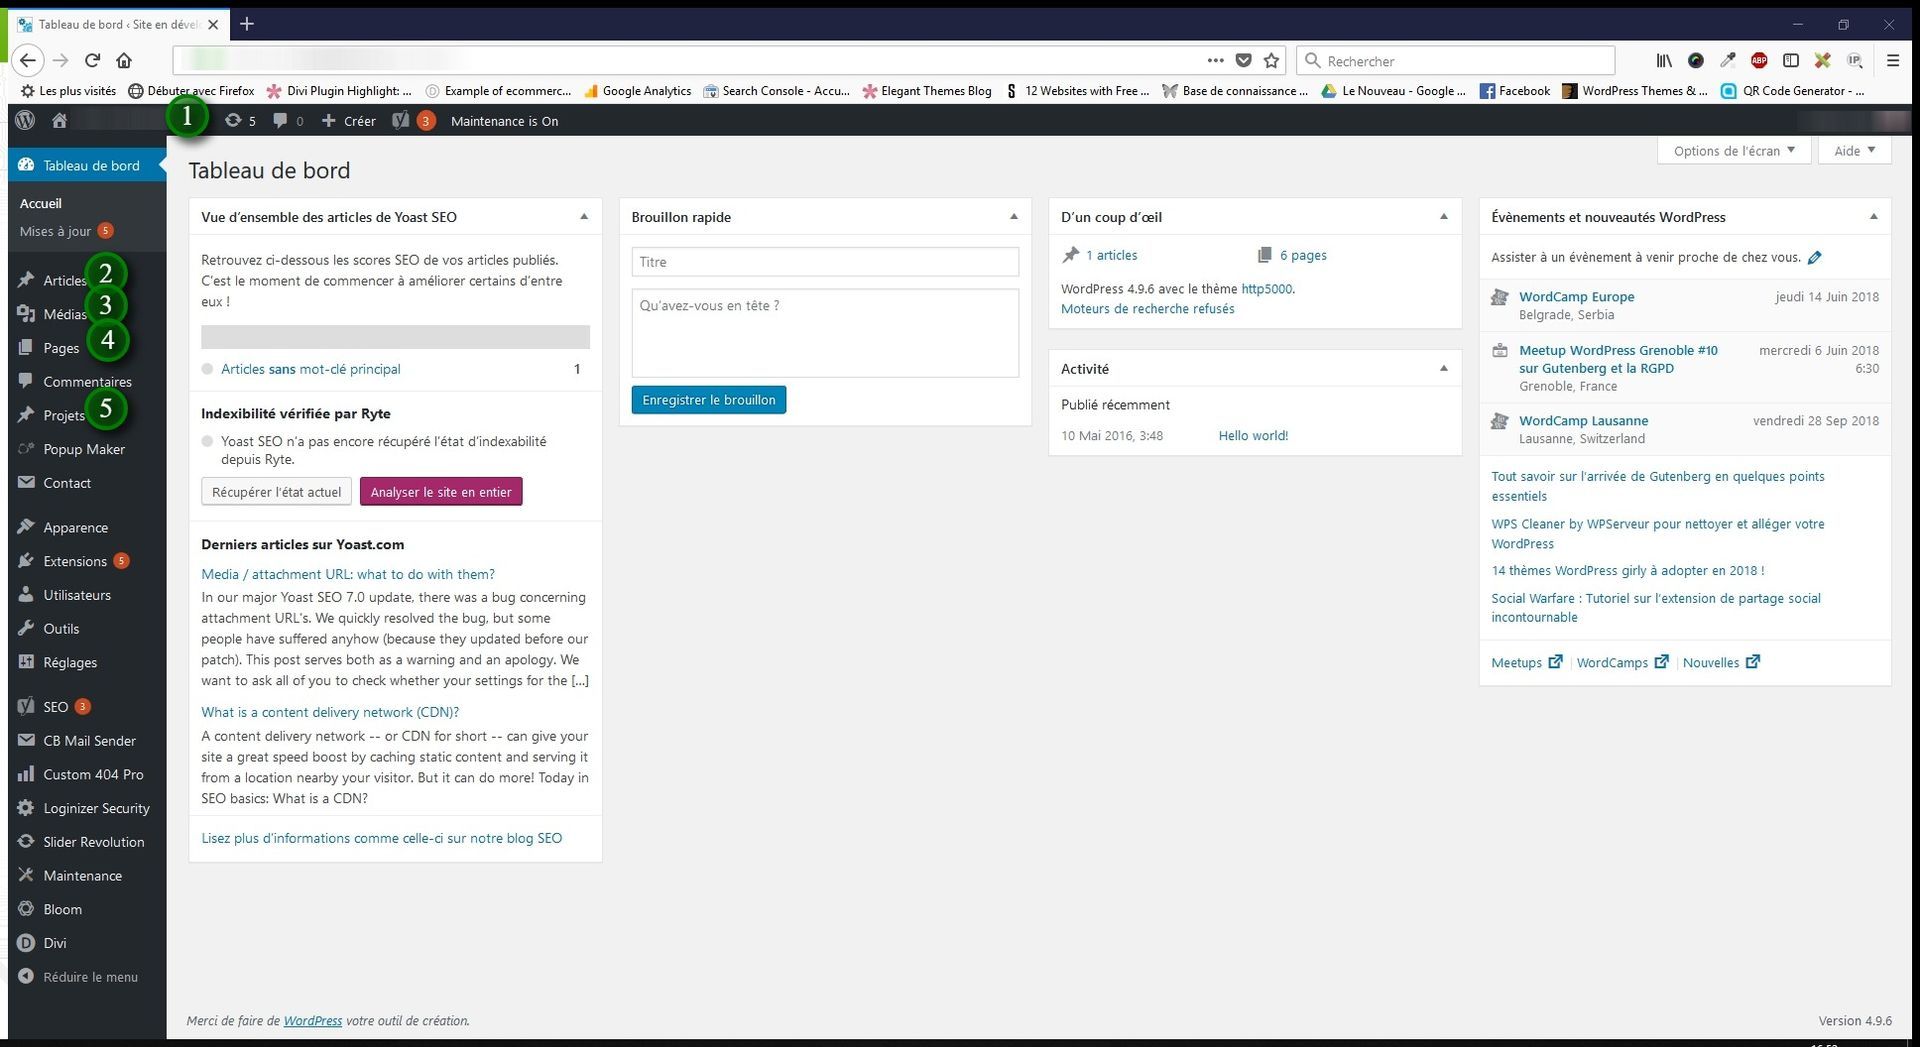
1/ In the black bar at the top, you will see a house icon: you can switch back to your website at any time.
2/ Posts: this is the blog section of your website — this is where you will add, edit, and delete your blog posts.
3/ Media: your website's media library, which contains all the images and files (PDFs, Word documents) on your site. You can delete items and add new ones.
4/ Pages: the most important part of the site — this is where you manage all your website's content (i.e. Home, Contact, Blog, etc.).
5/ Projects (optional): a hybrid between a post and a page. Very useful if you want to create case studies, in-depth testimonials, reviews, etc.
1/ Pages
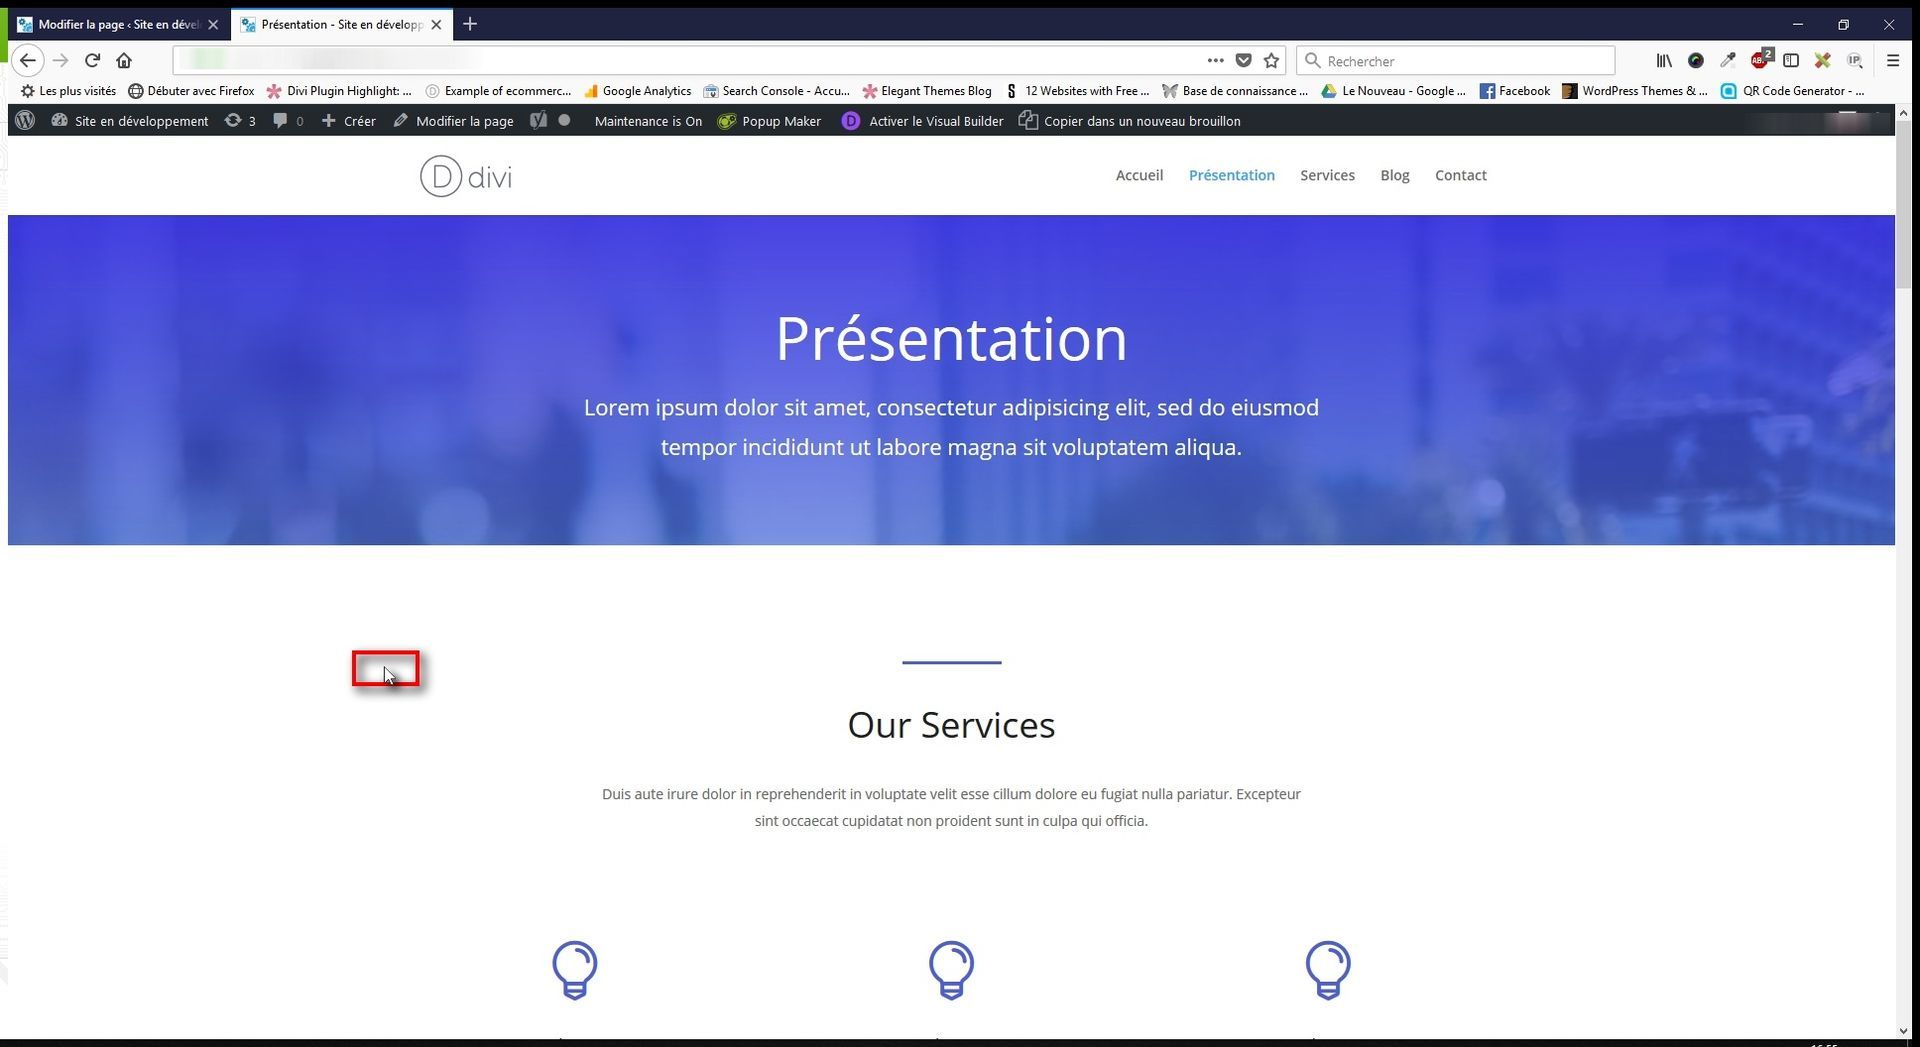
This is how a page appears in your browser.
You will notice that there are several columns and various elements such as text, icons, images, etc.
1/a/ Page list
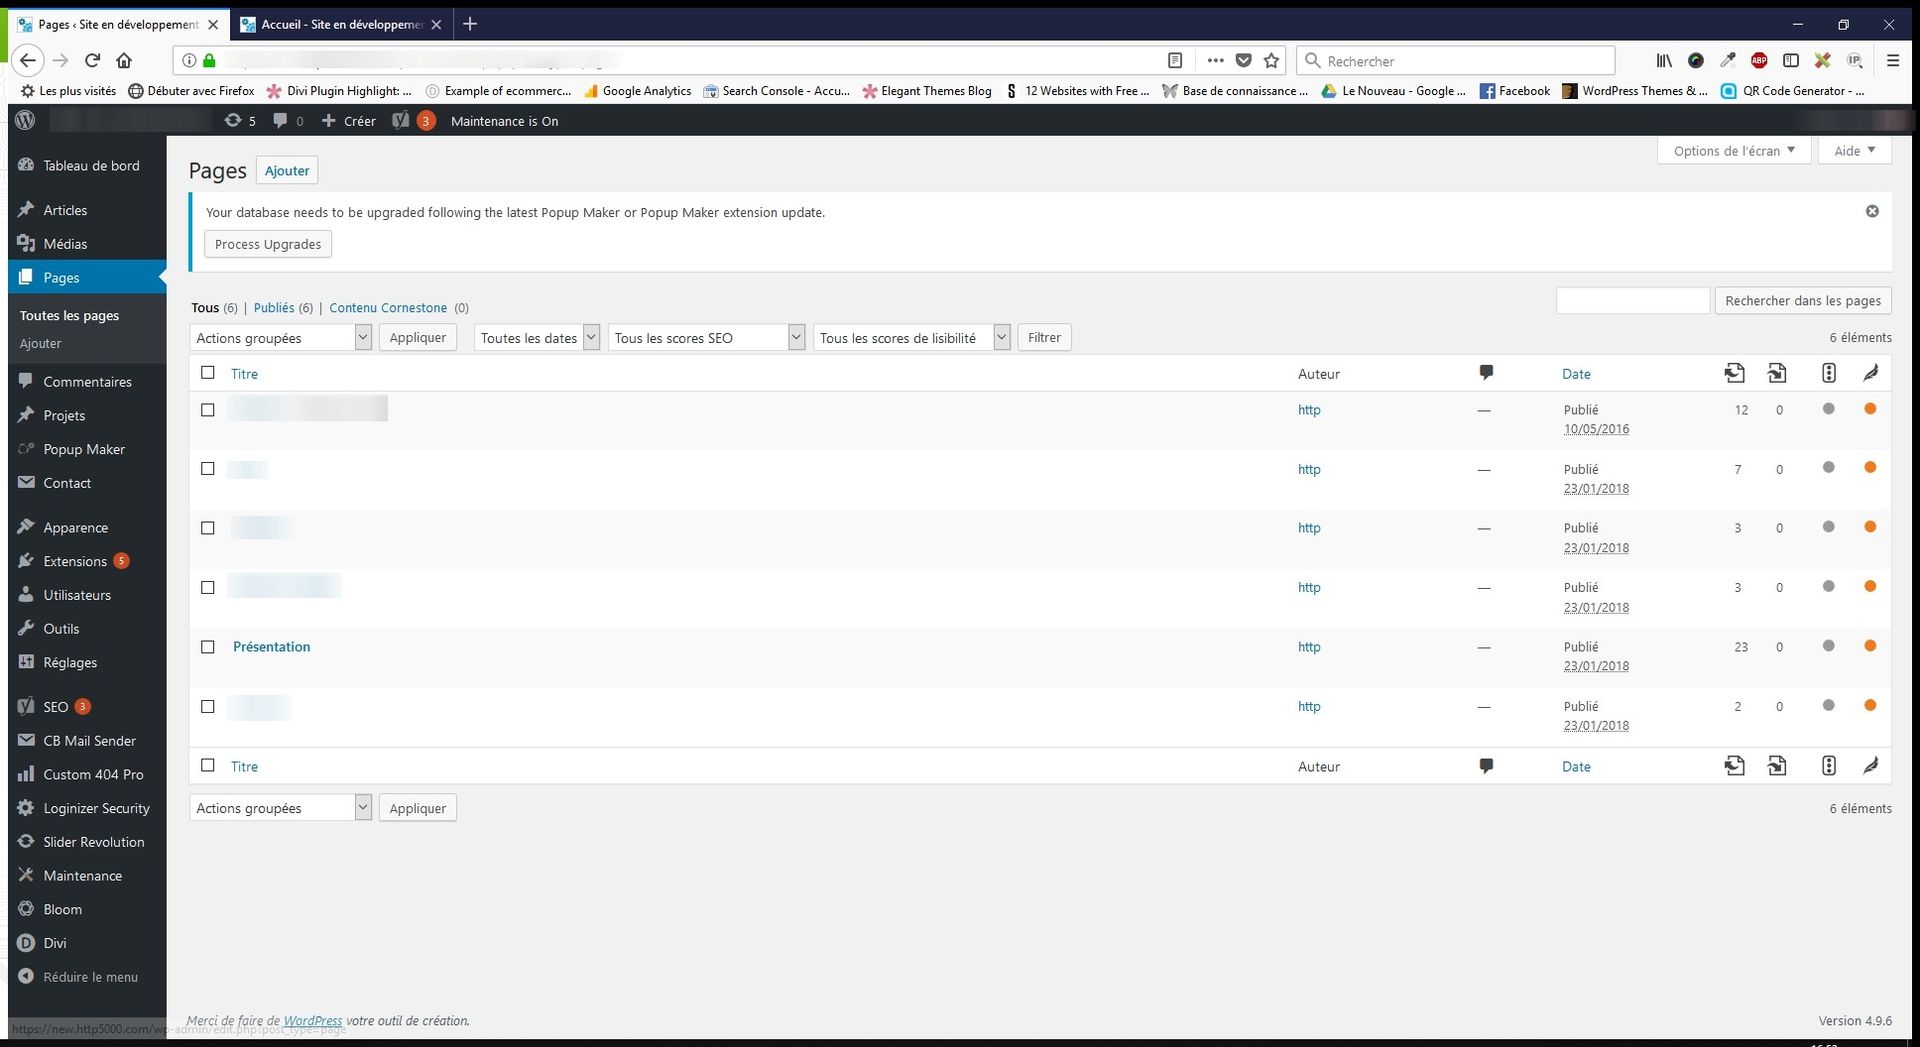
Back in the dashboard, go to the left-hand menu and click on Pages.
You will access the list of pages visible in the site's horizontal navigation menu.
We will now return to the page we looked at earlier in order to edit it.
1/b/ Editing a page
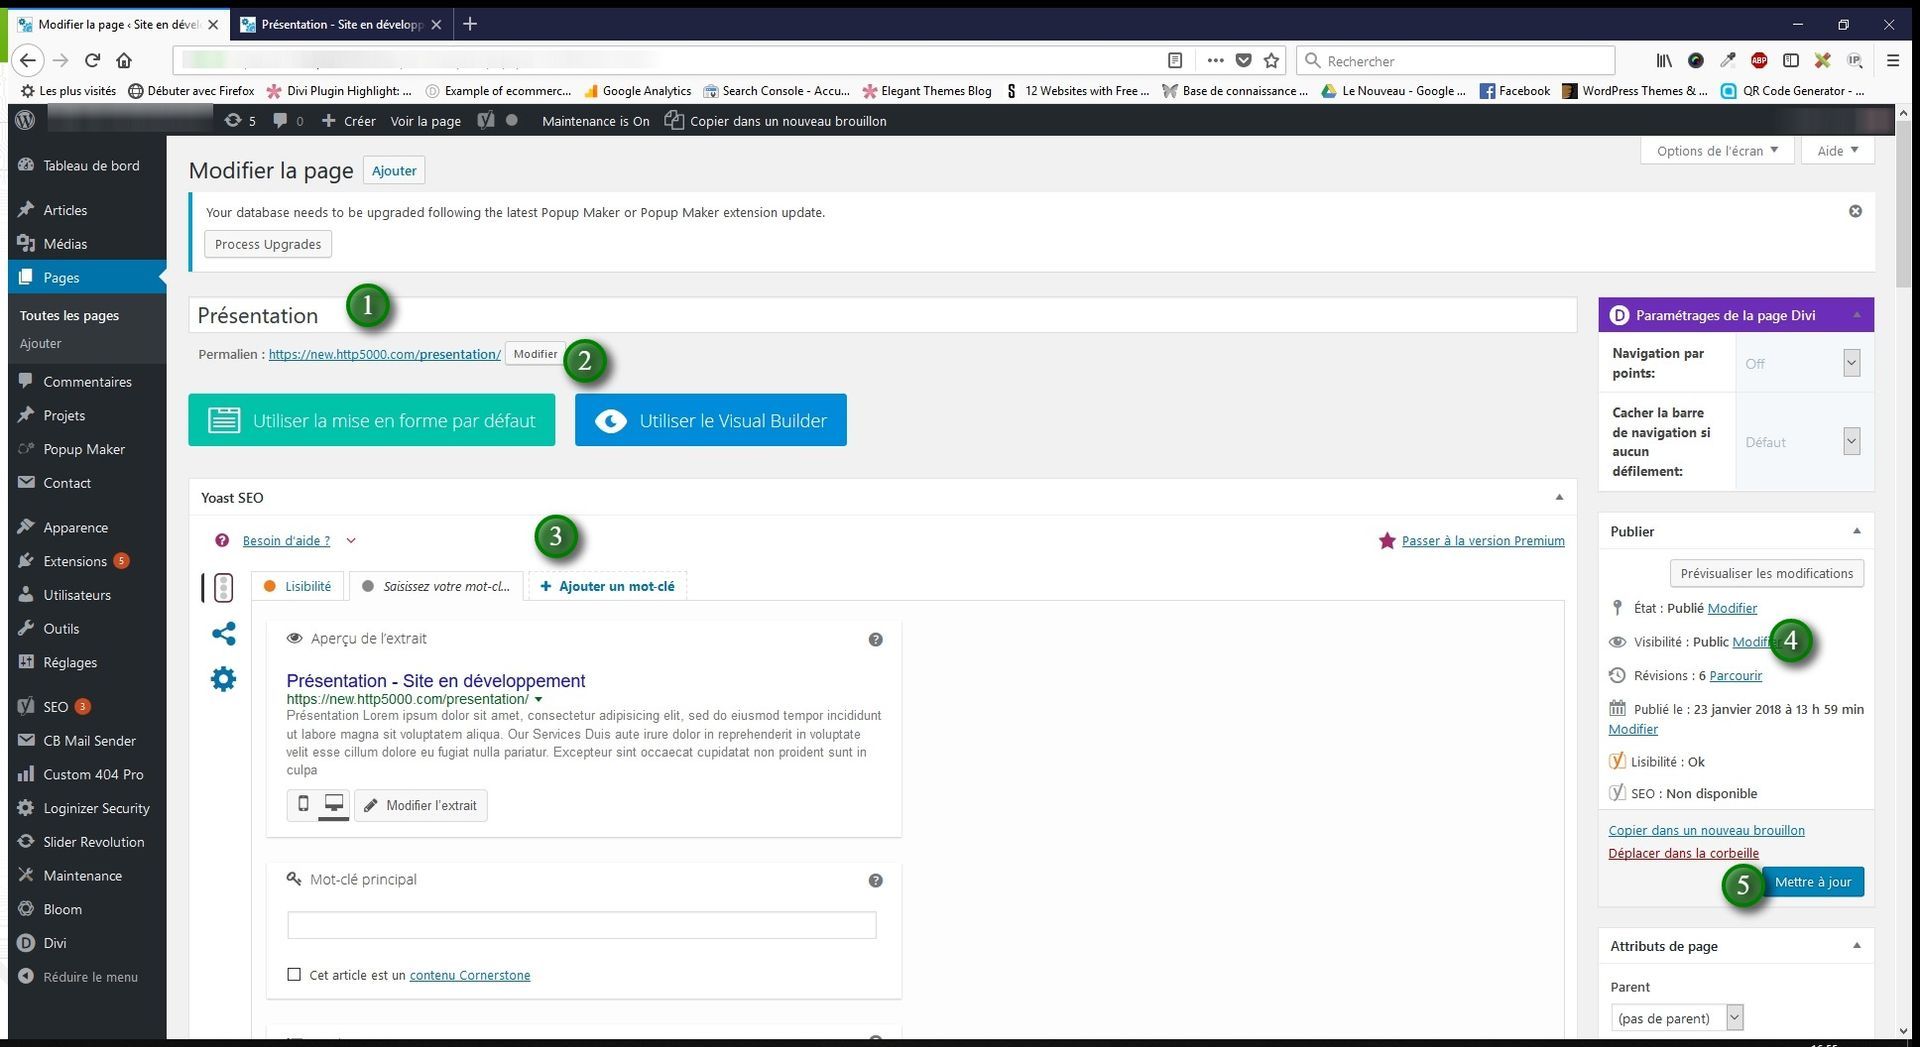
Here we are in the editing area for the page in question.
1/ Page title.
2/ Page URL, which is created automatically when you create a new page.
Please note: this is not the case if you have already created a page — you will need to remember to update the URL.
3/ Yoast SEO: a plugin that helps you optimise your search ranking. Using a traffic-light system, you can see what you can improve or change to achieve a good score.
4/ Page visibility: changes the page status (public, private, password-protected, draft). You can leave it as a draft if you wish to publish it later.
5/ Update button: validates all changes to your page (mandatory to save what you have entered).
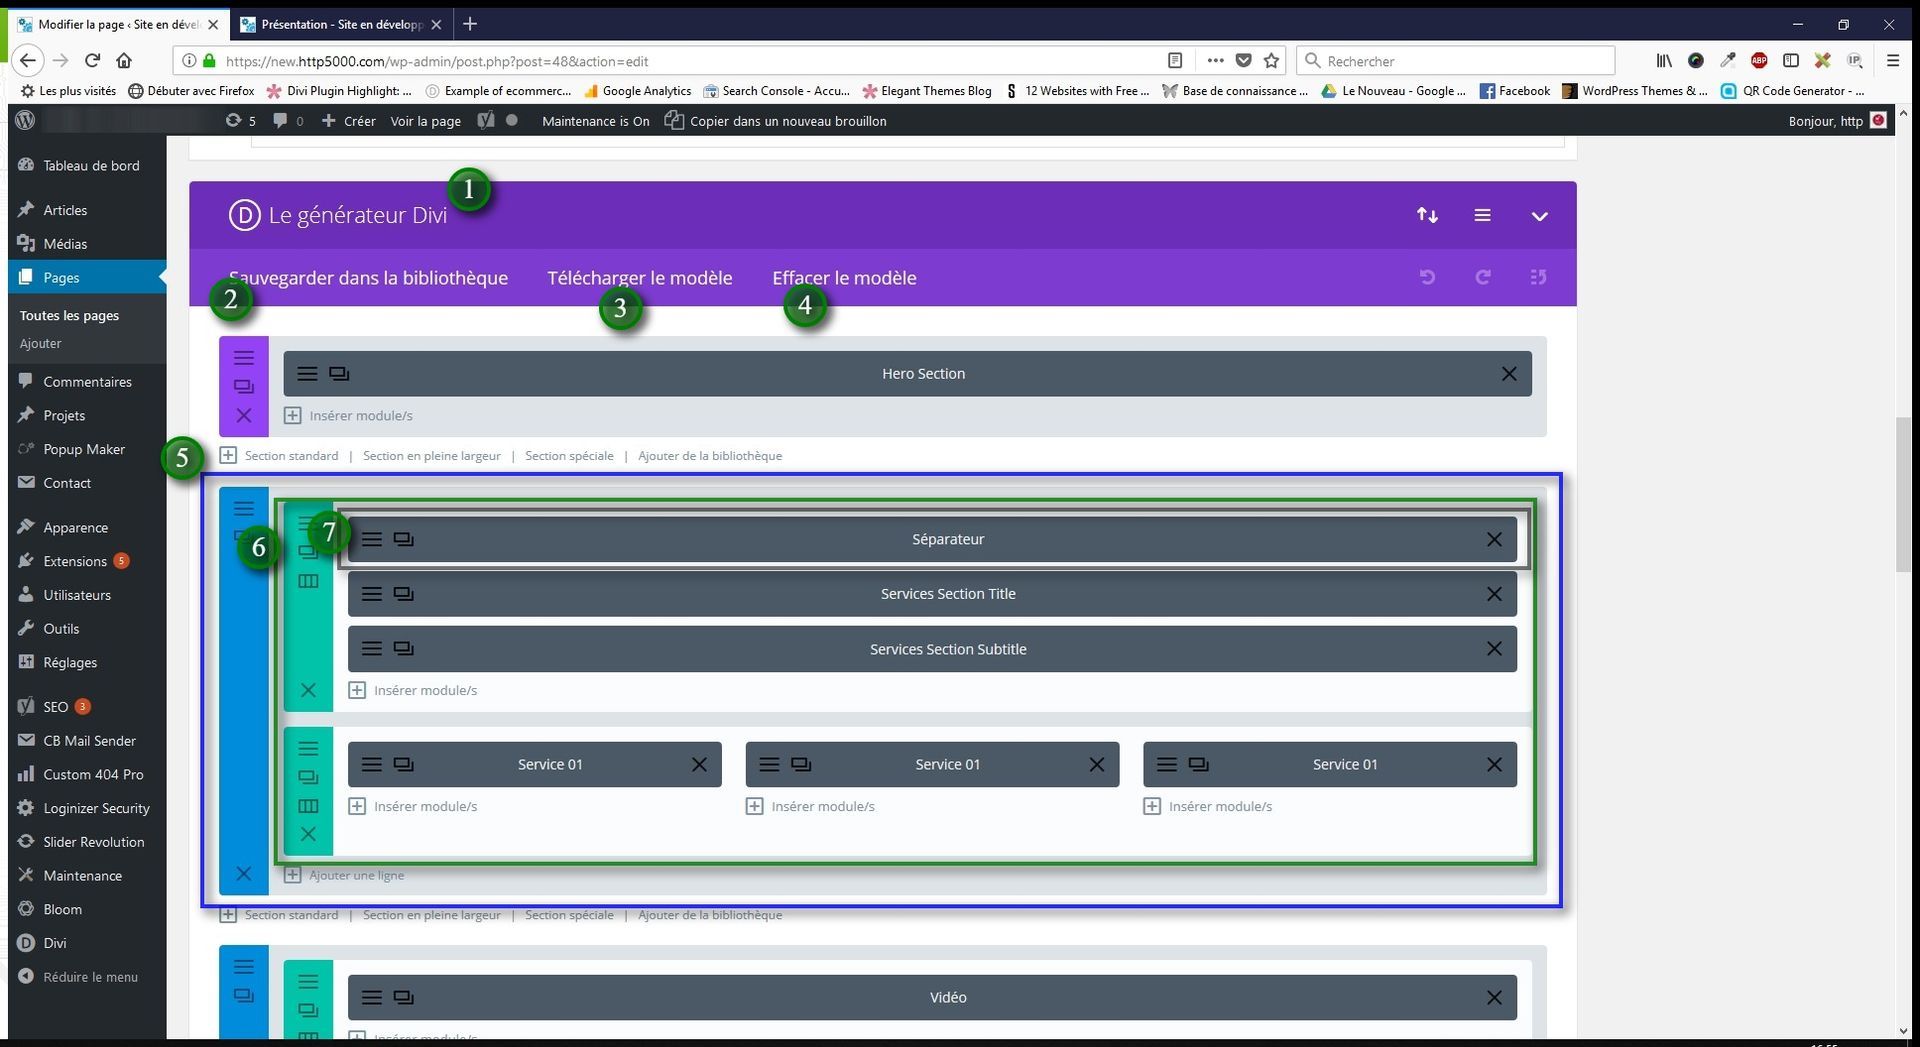
1/ This is the DIVI builder. It is the purple section that manages your site's content. It appears as sections in different colours.
2/ Save to library: a tab that lets you save your page template for reuse.
3/ Load template: a tab that lets you load a pre-built template and apply it to your page. You have Divi templates created by Elegant Themes.
4/ Clear template: clears your page content.
5/ Here is the overall structure of your content layout:
Blue area — the section: a block created by default that contains columns and content types such as images, text, forms, etc.
6/ Green area — the column: the columns that "divide" your page into a defined number of columns: 3 columns, 4 columns, 2/3, 1/2, etc. This is where your page content sits.
7/ Grey area — the module: this is your site's content: text, images, forms.
Each "area" has small buttons on the left:
Three bars: Settings
Two overlapping windows: Duplicate the section / column / module
Three columns: Column type (for the green area only)
Cross: Delete the section / column / module
You can drag the grey modules and reposition them with your mouse.
1/c/ Example page
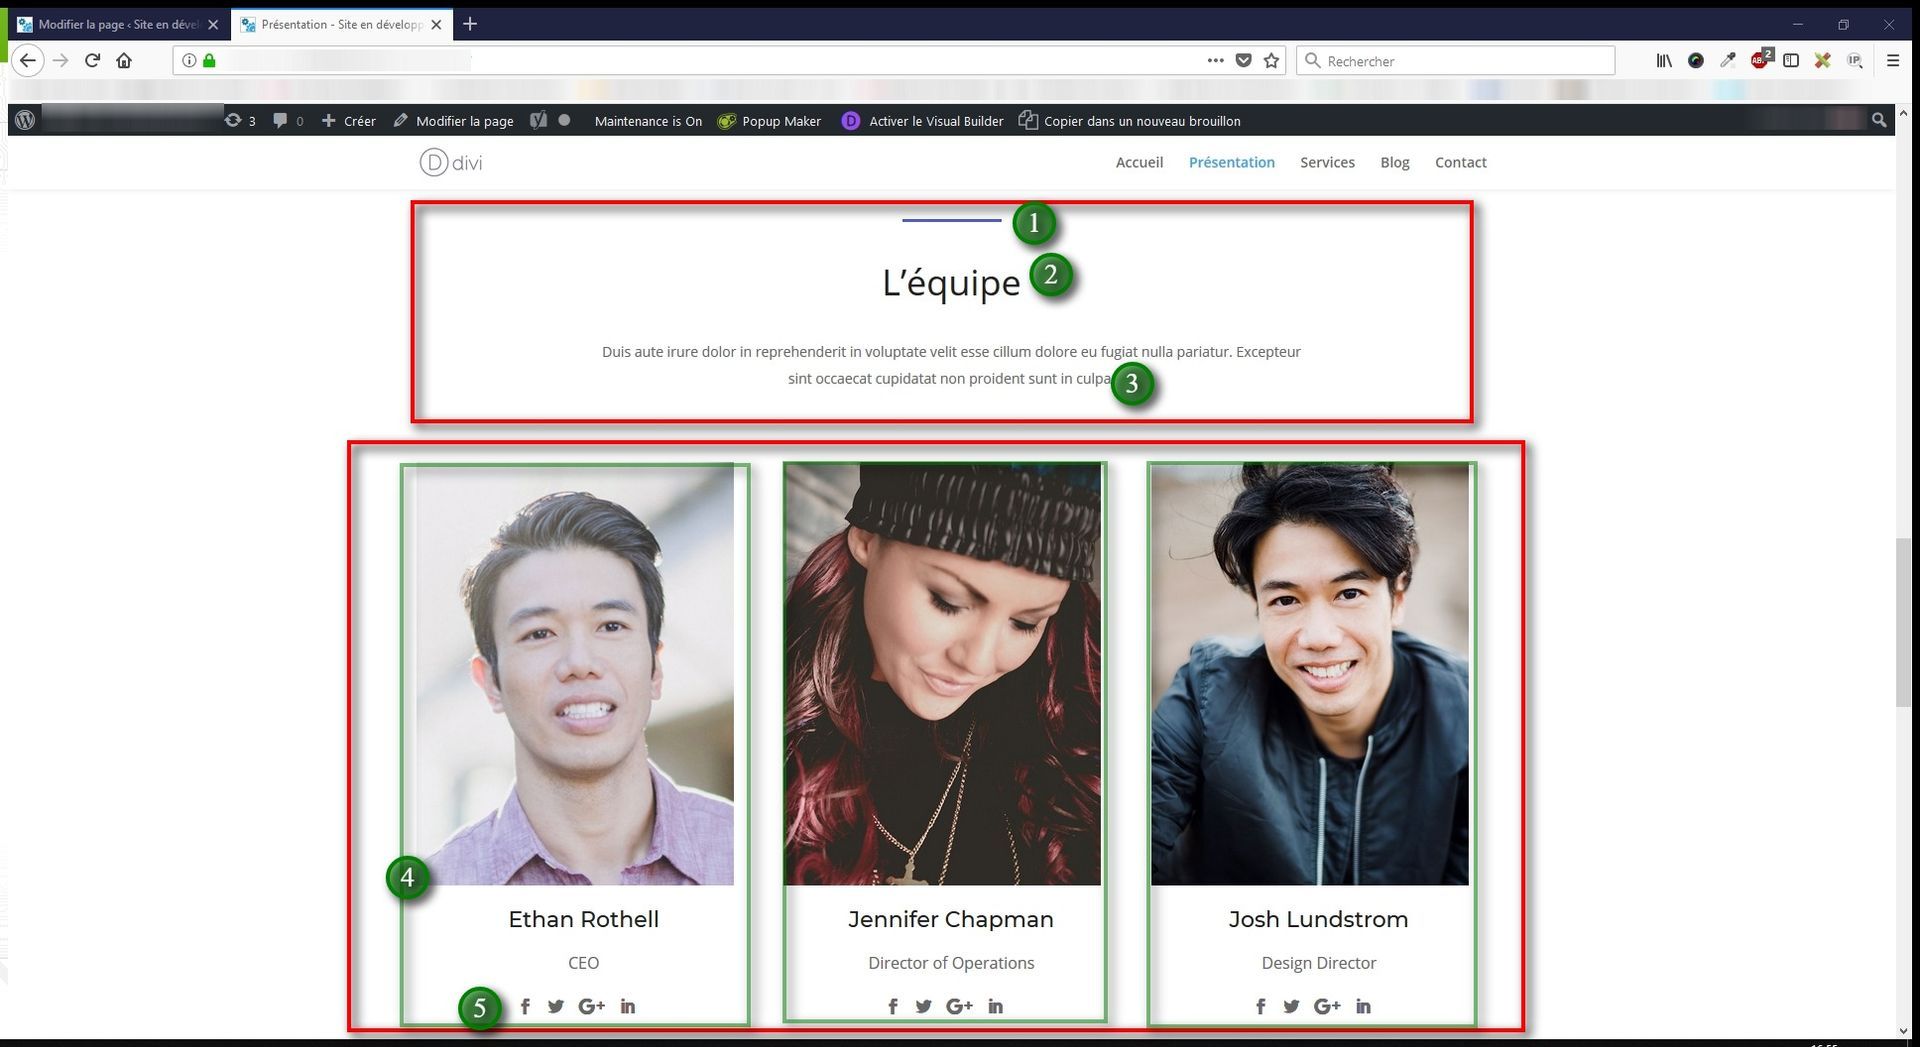
Here is a sample page containing:
1 full-width column with:
1/ Divider (purple line)
2/ Title (enlarged text)
3/ Text
3 columns, each containing:
4/ A "Person" module type: allows you to display an image, title, and text for a team member, for example, plus integrated social media links.
This is how the page appears in the browser.
We will see in the next image what it looks like.
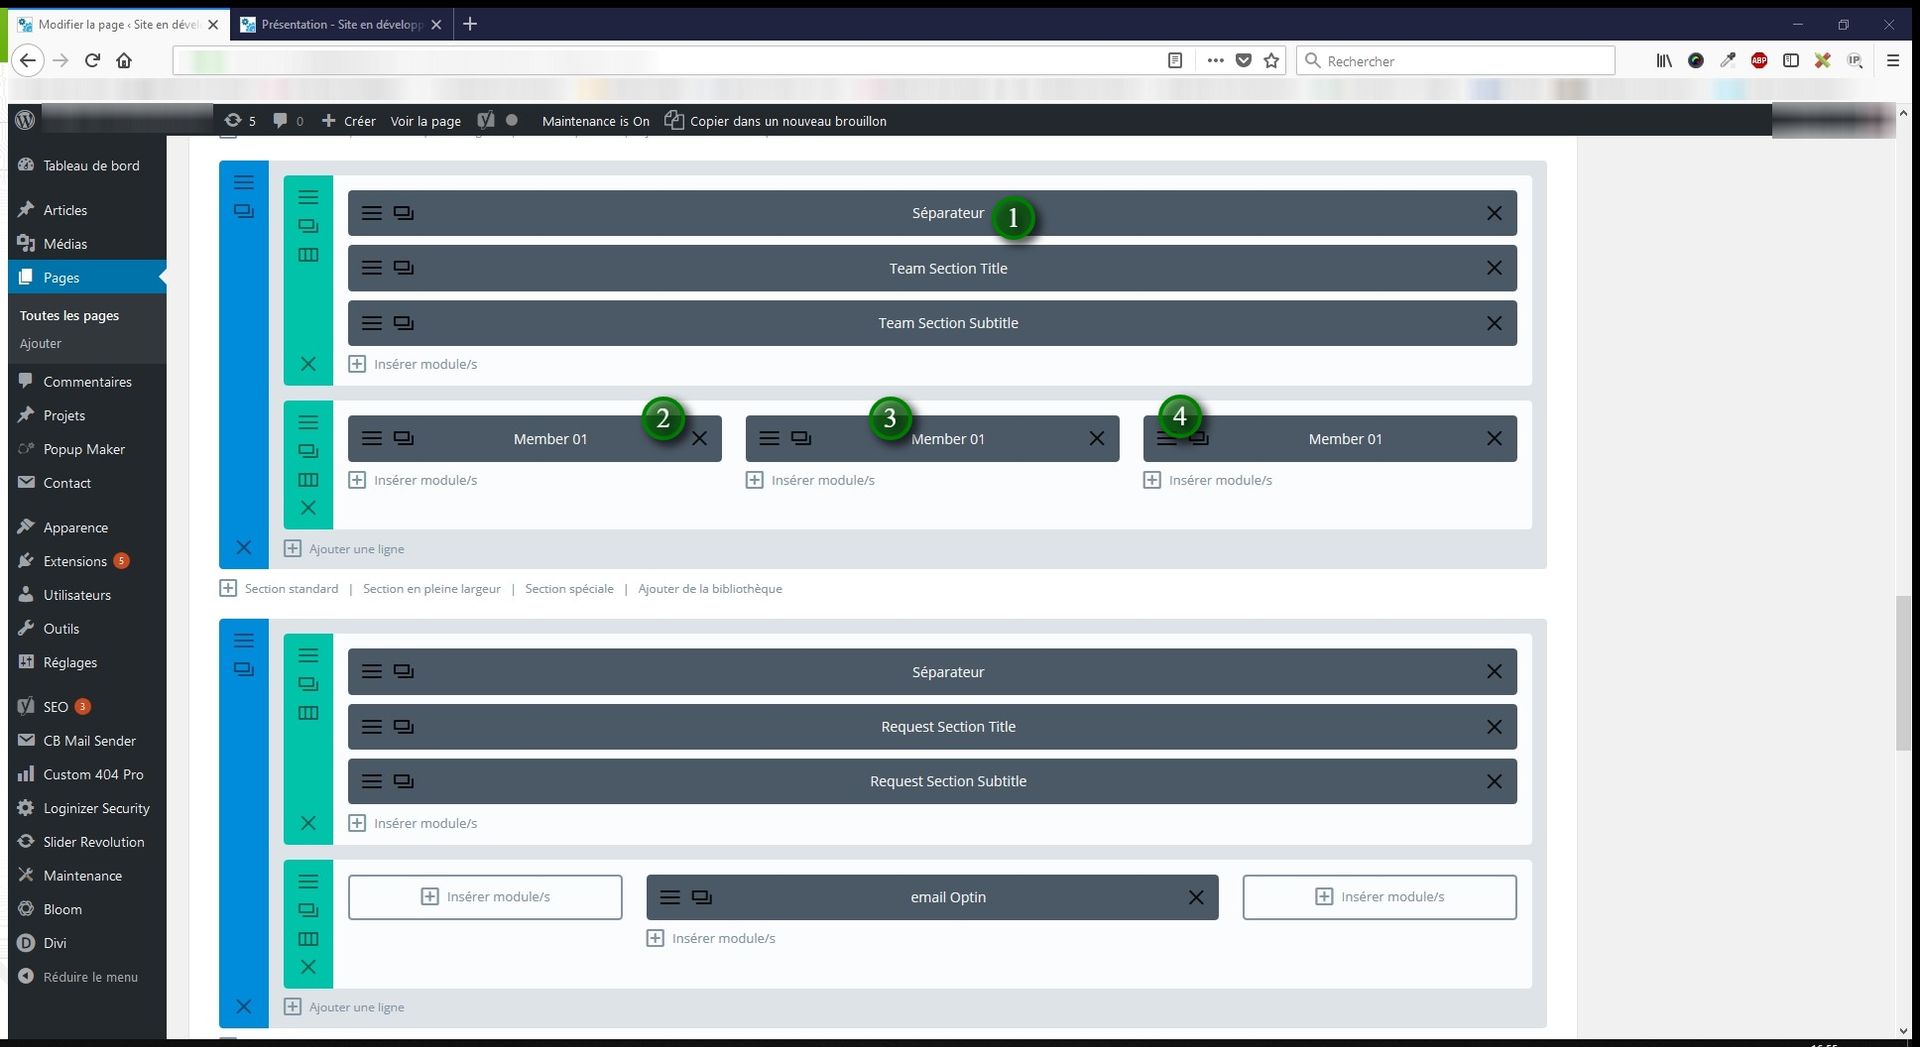
Back in the back end, here is the page broken down into detailed modules and columns:
Each created module has a "label" corresponding to its type.
1/ Example: the divider module is called Divider and will be labelled as such when you create one.
In the module settings, it is recommended to rename them so you do not lose track of your page structure.
2/ 3/ 4/ The three modules in the three columns are also visible here.
Divider Module
We will now edit the divider (purple line).
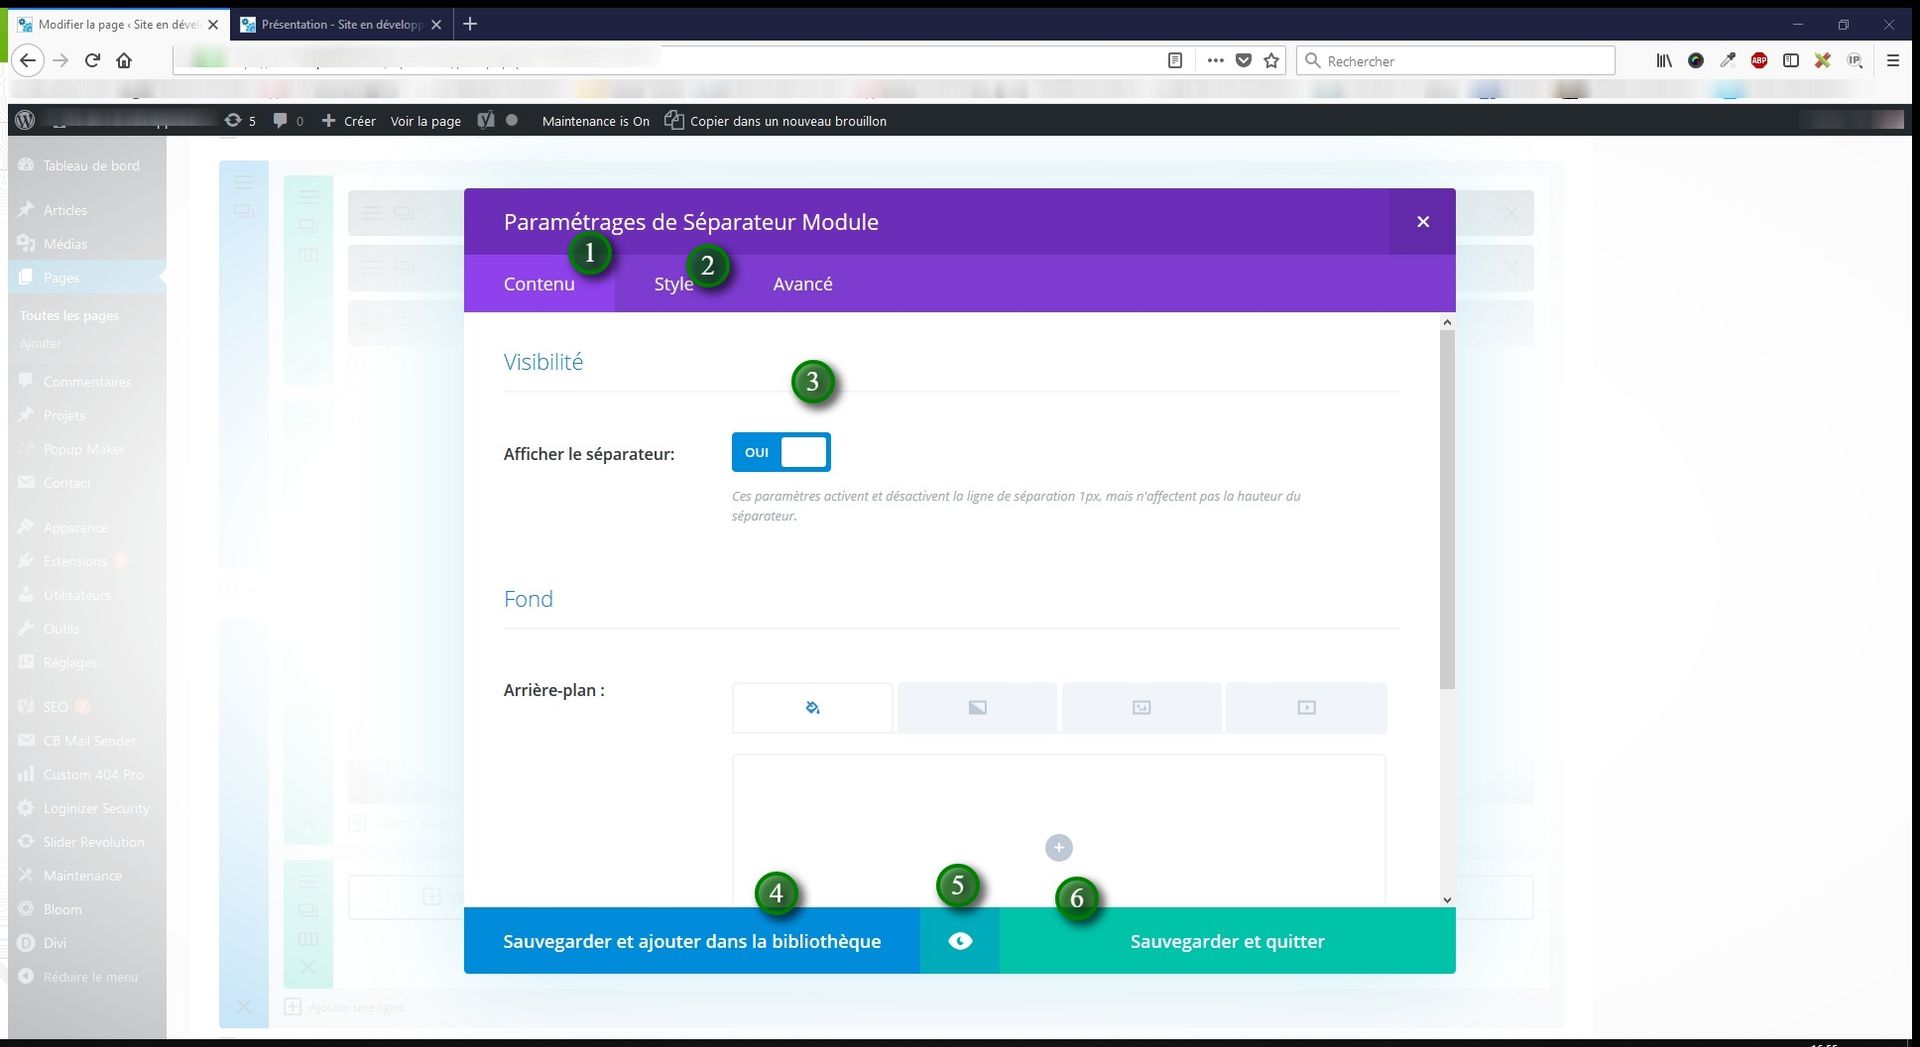
After clicking on Settings, a pop-up window opens. The structure presented here is found in the majority of modules. Only the options differ.
1/ Content: manages the content of your module.
2/ Style: allows you to style your content (colours, shape, thickness, etc.).
3/ The various options for the module.
4/ Save and add to library: lets you save your module to your library and reuse it in other pages, posts, projects, etc.
5/ Eye icon: displays a preview.
6/ Save and close: saves the changes made to the module.
After clicking this, do not forget to click Update at the top of the page.
Text Module
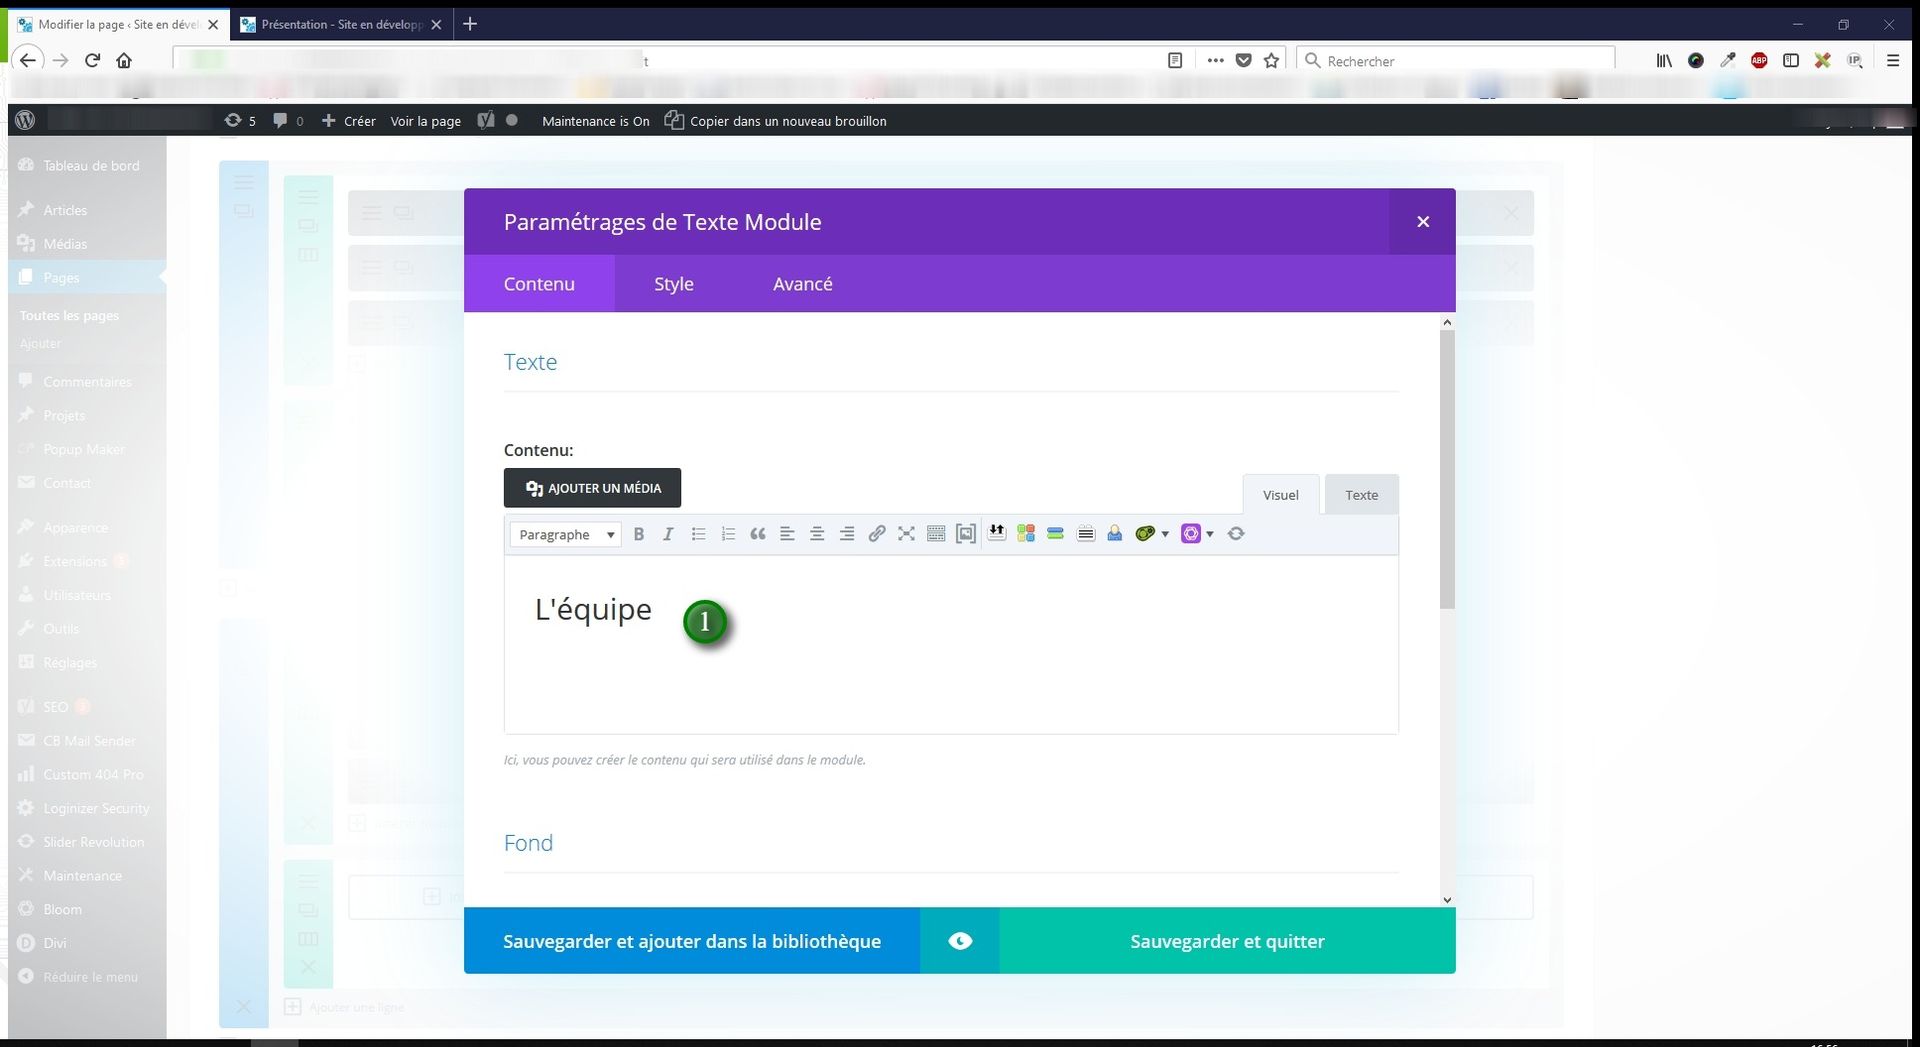
The layout and display are the same as before.
1/ In the white space, you have a word-processing tool similar to Word, which allows you to apply bold or italic formatting, create headings, etc.
Person Module
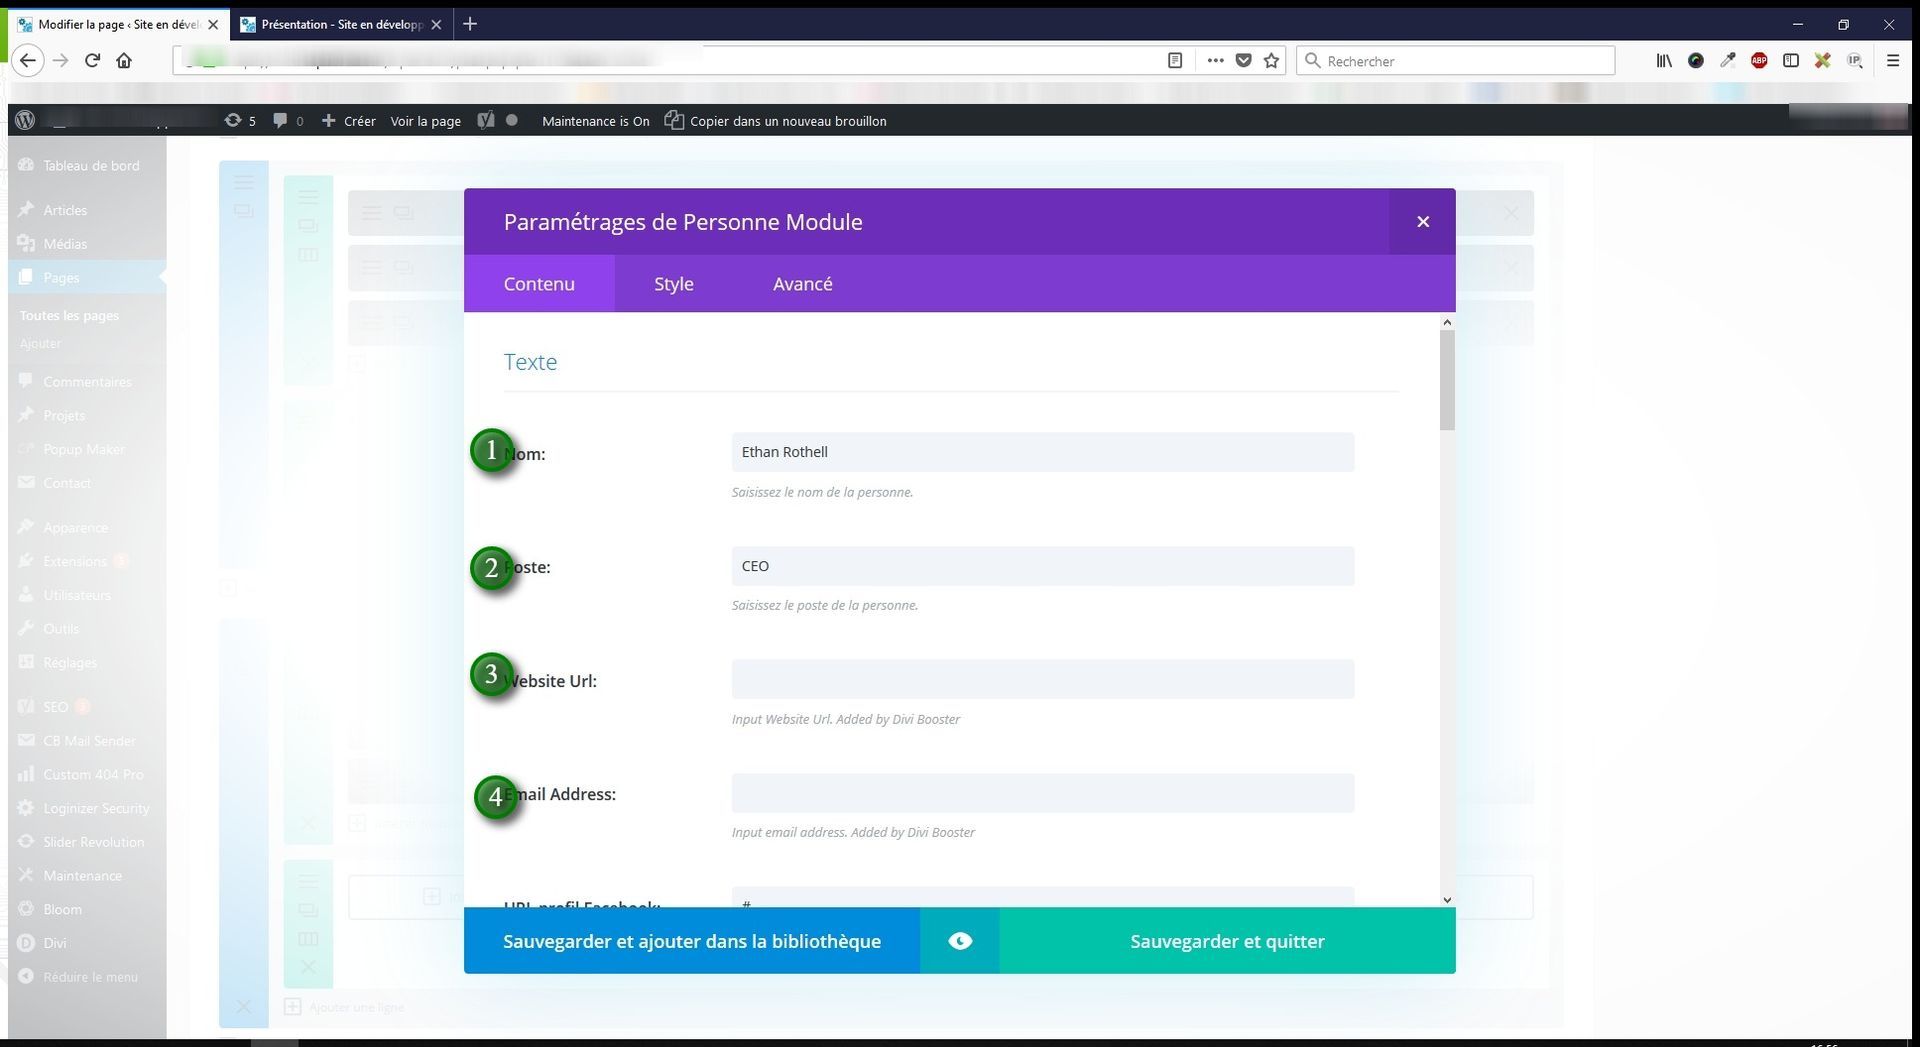
The Person module is a special module that allows you to display a profile of a person, including their photo, job title, contact details, and social media links.
1/ Person's name
2/ Position within the company
3/ URL
4/ Email address
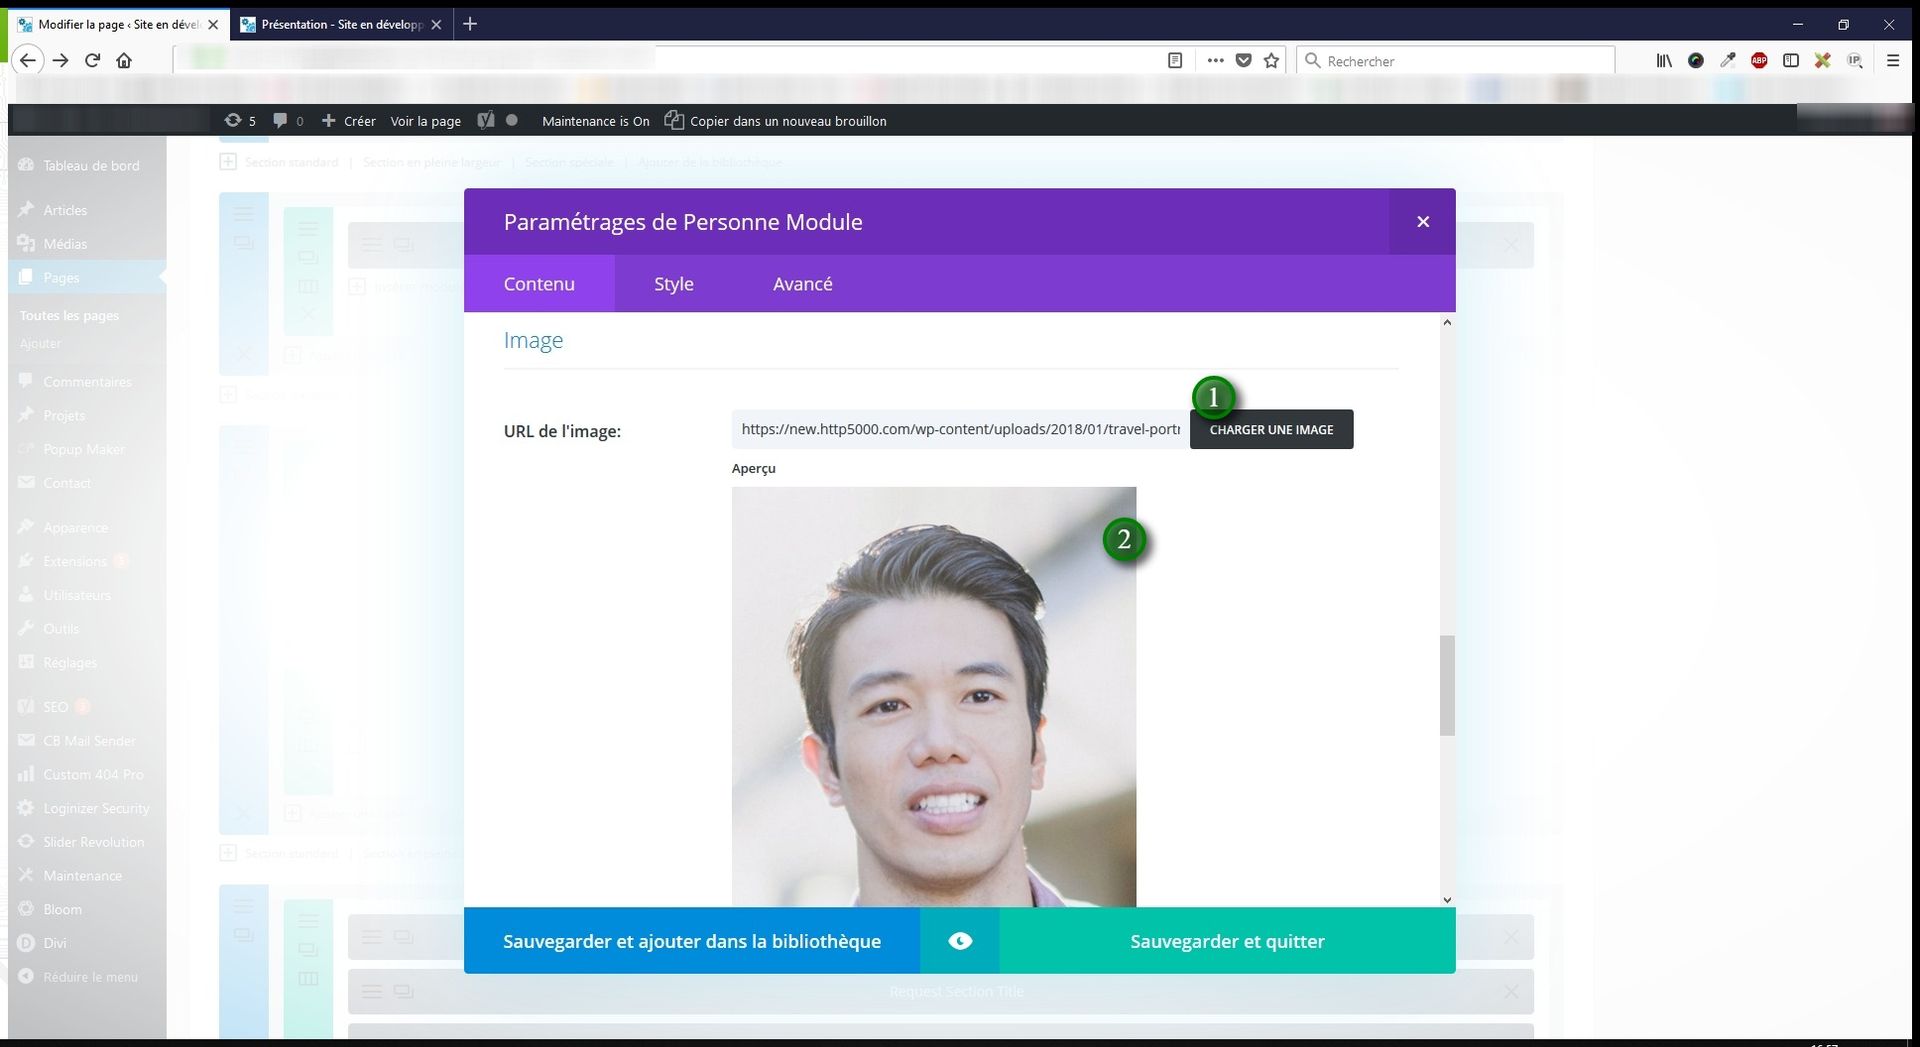
If you want to change the person's image, click on Load image.
2/ Here you can see a preview of the image.
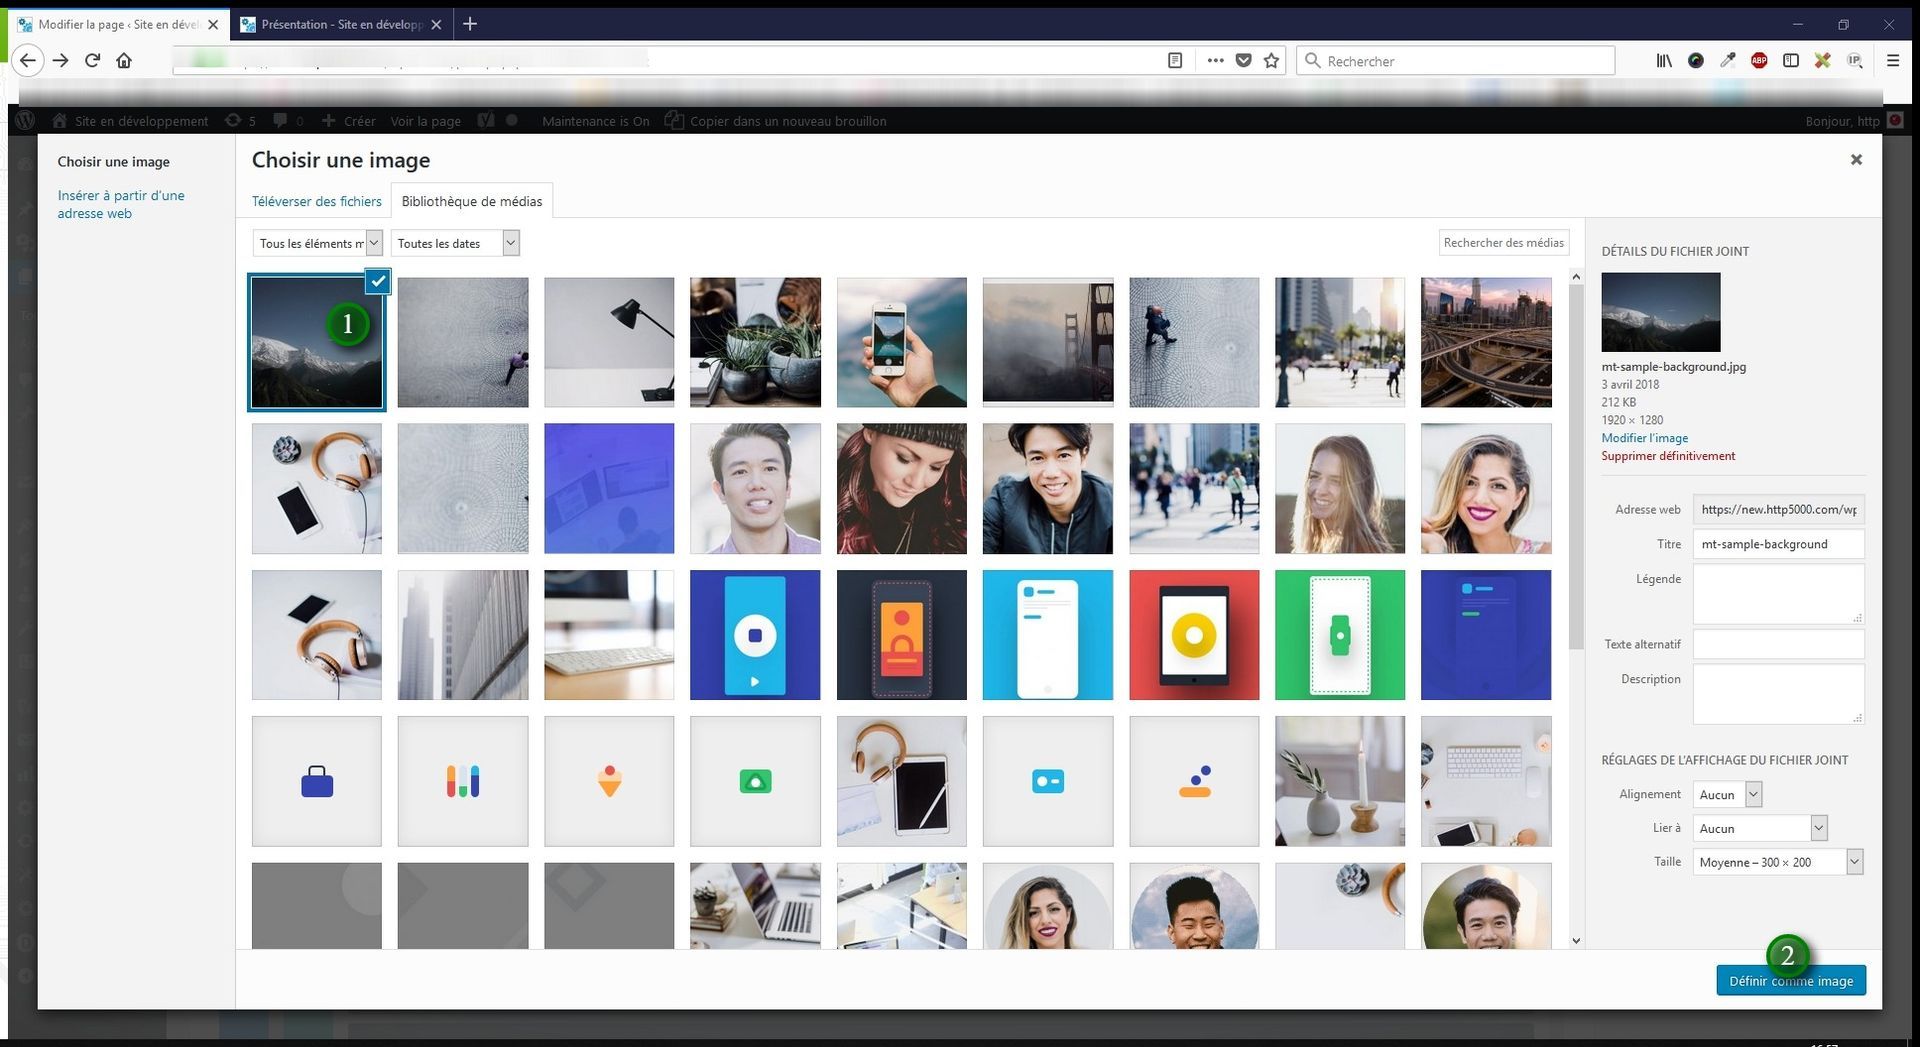
After clicking the button, a pop-up window appears.
This is WordPress's media library, which contains all the images and other media on your website.
All you need to do is select an image if it is already in this library.
If the image is on your computer, simply drag it from your computer into this window. It will automatically be added to the library.
2/ Posts
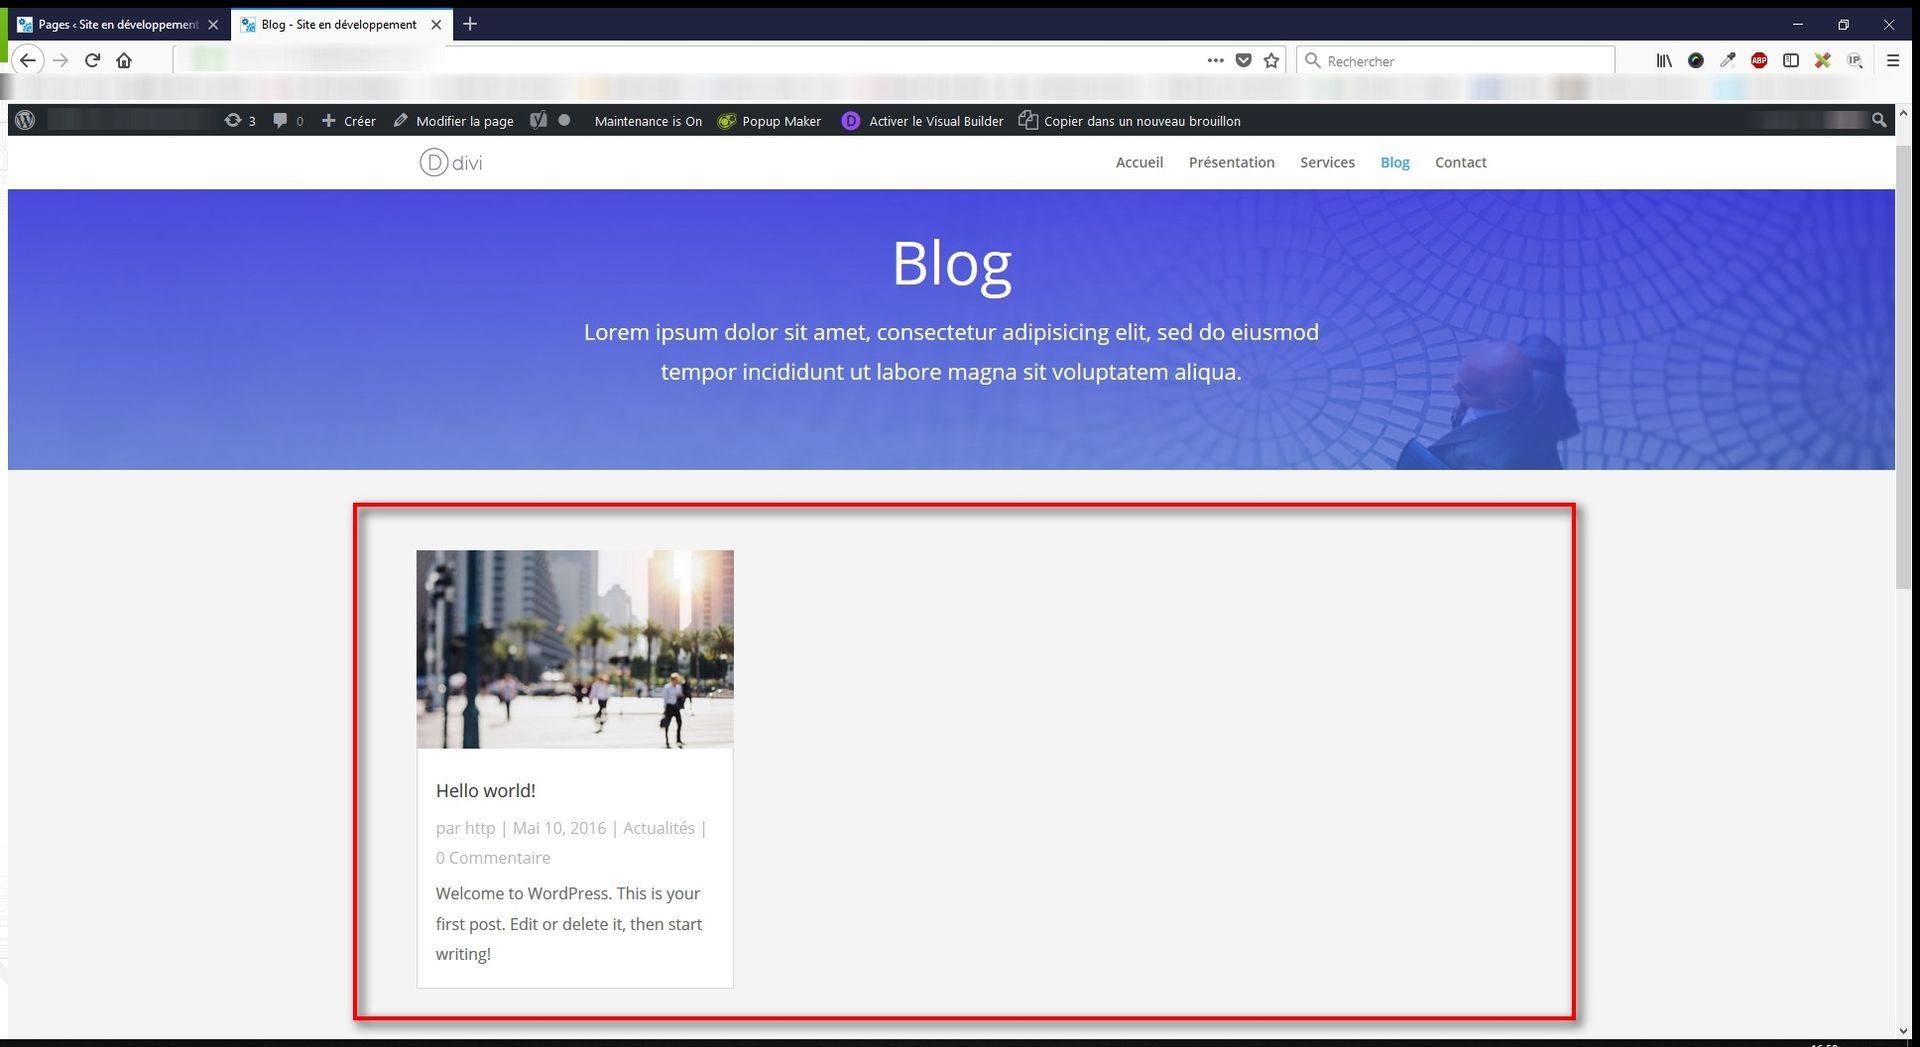
We are on a typical blog page.
The highlighted area is a blog module. It displays your website's posts in a card format across three columns.

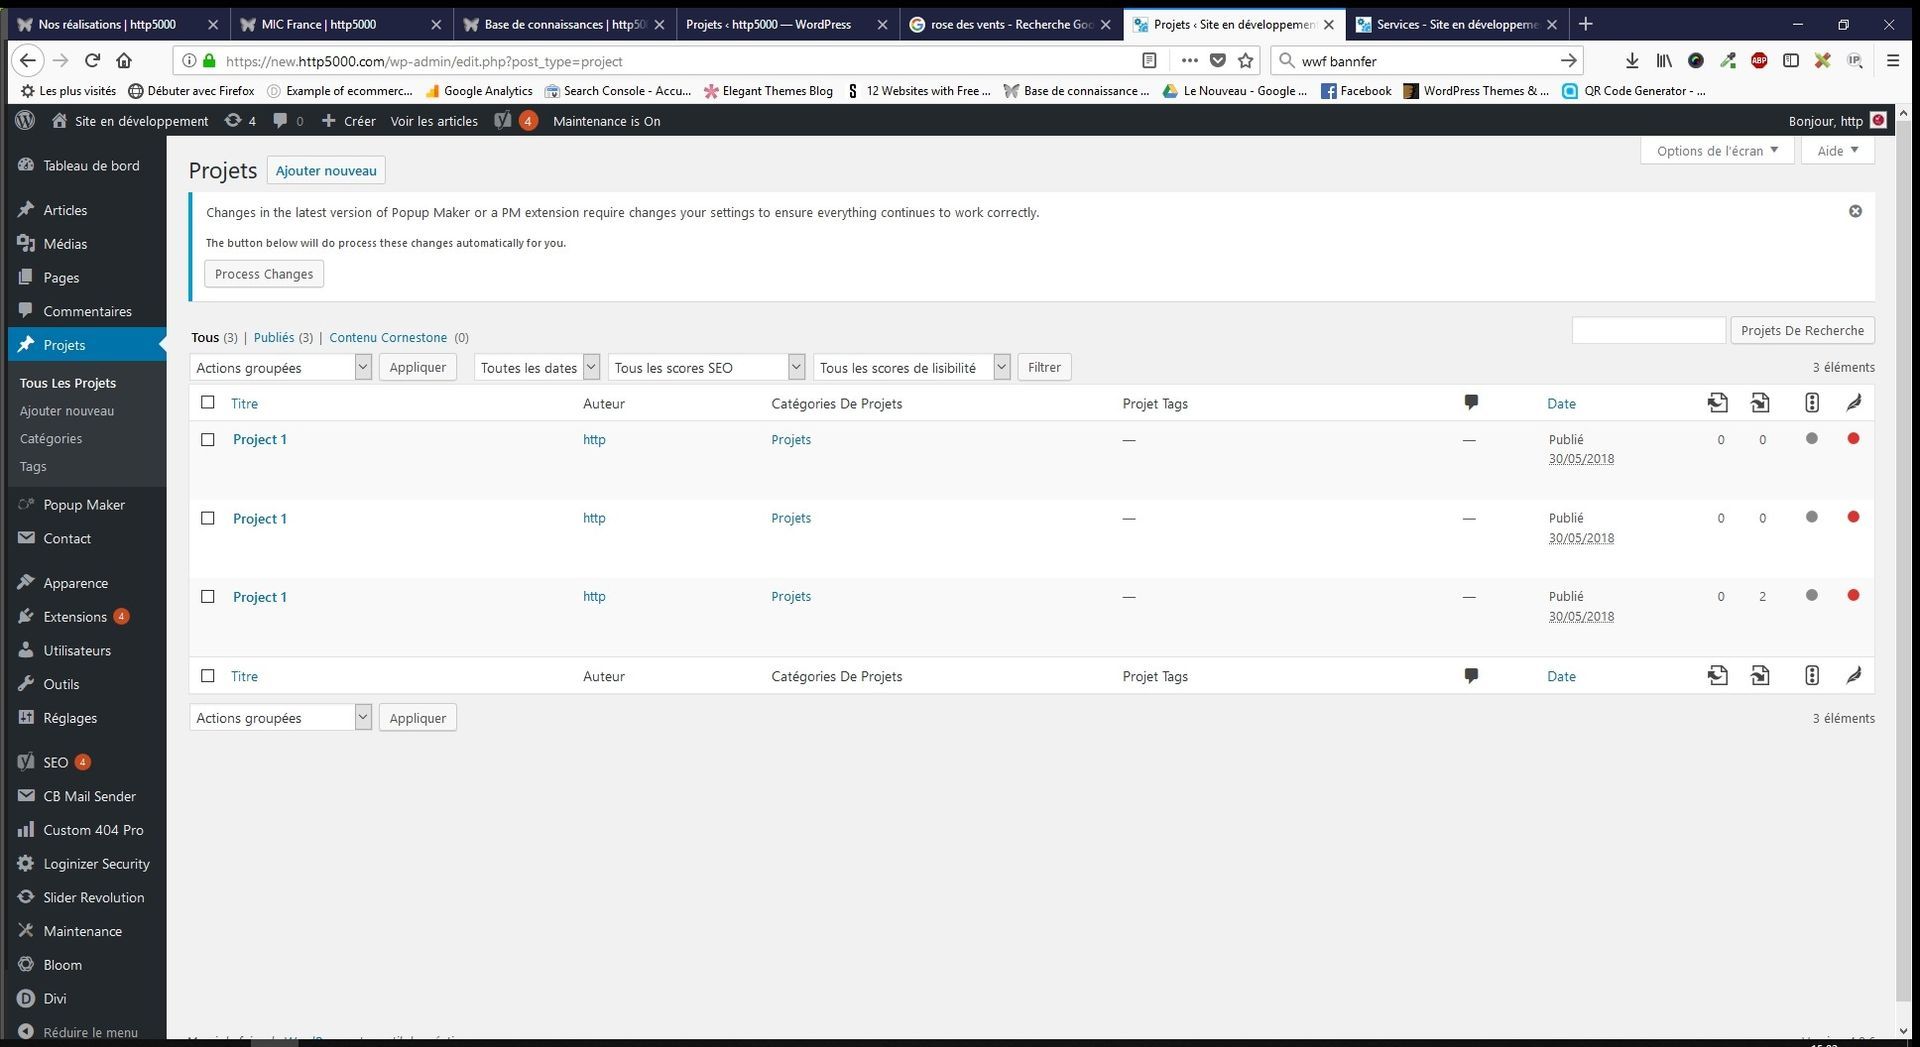
In Posts, you will find the full list of all your website's articles.
1/ The Add button allows you to add a new post.
2/ You can see the post title — click on it to edit it.
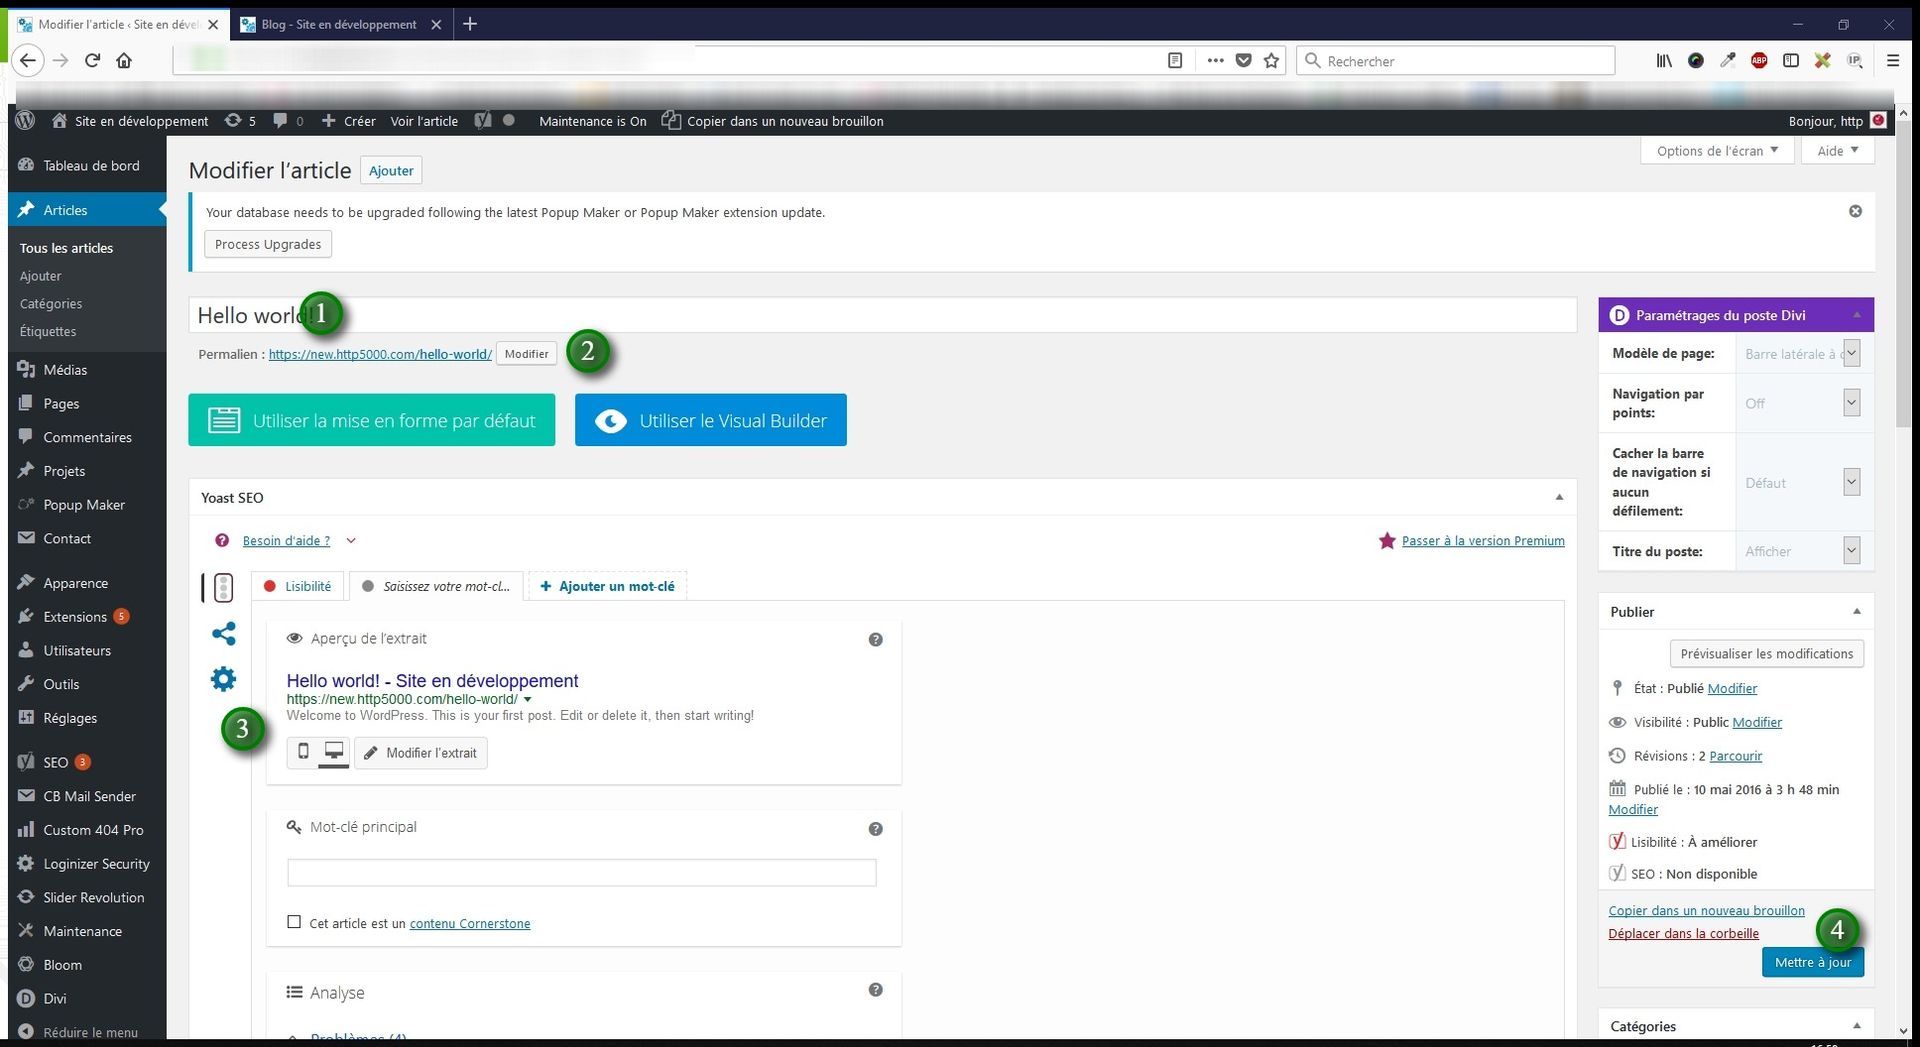
1/ Post title
2/ Post URL
3/ Yoast SEO: for search optimisation
4/ Update button to save your changes
The process for posts is the same as for pages.
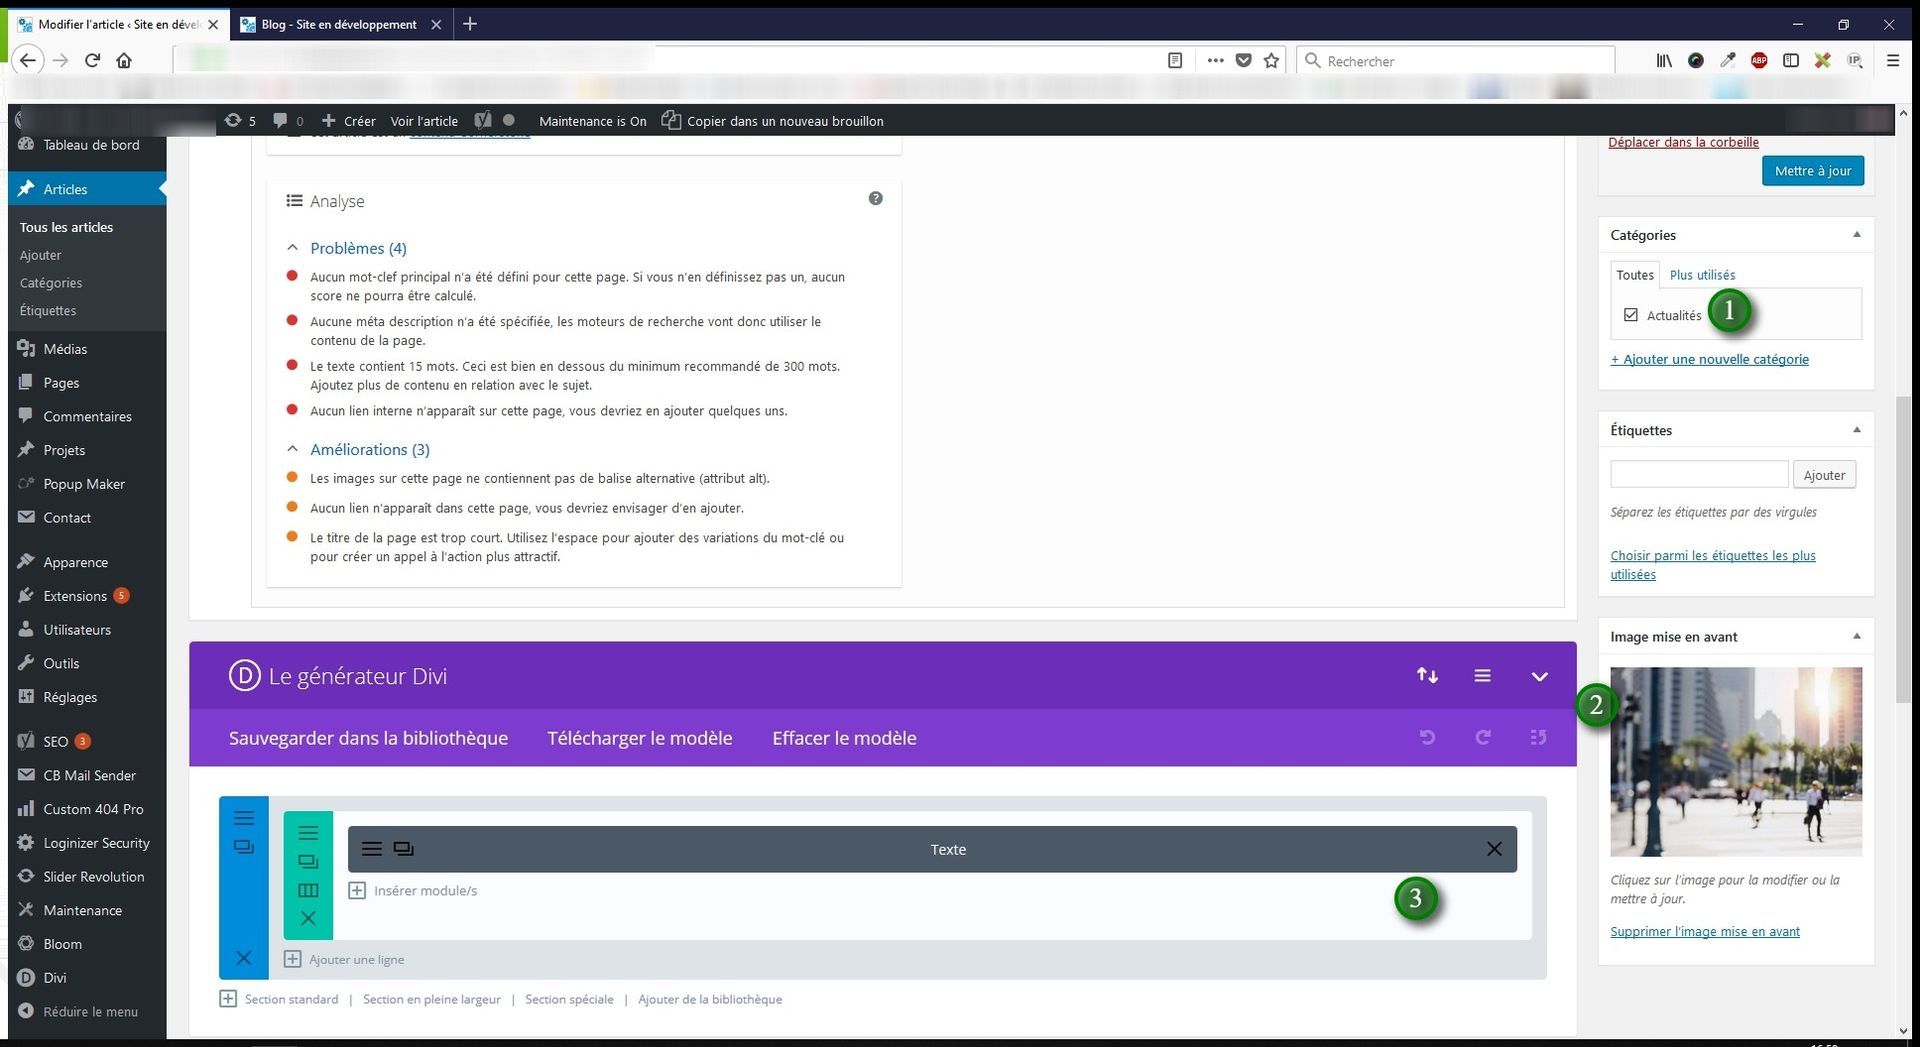
1/ Post category: on your website, you can create several categories for your blog. Tick the correct category for the post first, then on the Blog page you can choose which category to display in the Blog module.
2/ Featured image: this is the thumbnail shown in preview. It is recommended not to use an image that is too small (160×160px was the maximum), which is bad for SEO, or too large (do not exceed 52 KB in file size and 1024 px in dimension).
Reserve large images (which should also not exceed 1500px) for backgrounds and panoramic shots.
3/ Same editing area as for pages.
3/ Projects
Here is the Projects option in Divi. It is a hybrid between a post and a page. It is particularly suited to companies wanting to showcase client work, build portfolios, create case studies, detailed testimonials, demonstrations, and so on.
The advantage is that you can display previews of several of your projects on a single page without having to create columns, add images, etc.
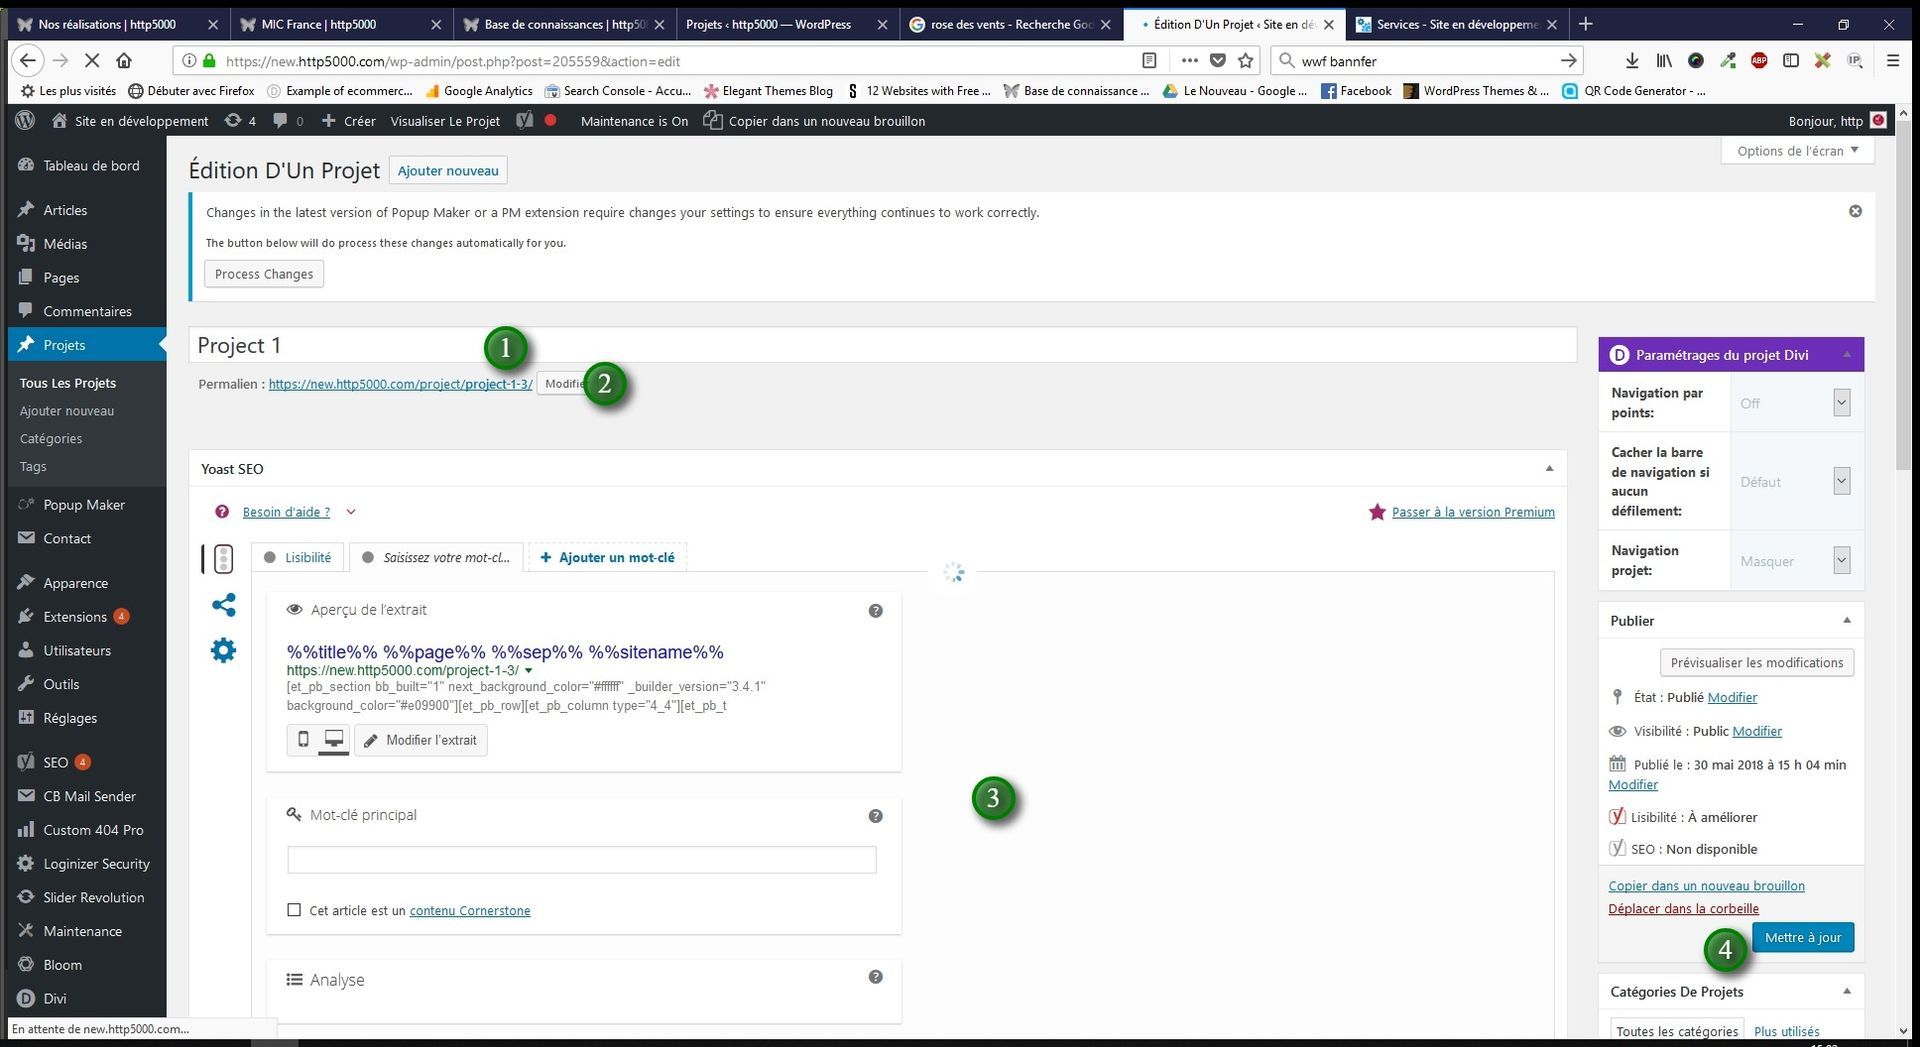
1/ Project title
2/ Project URL
3/ Yoast SEO: for search optimisation
4/ Update button to save your changes
The process for projects is the same as for pages and posts.
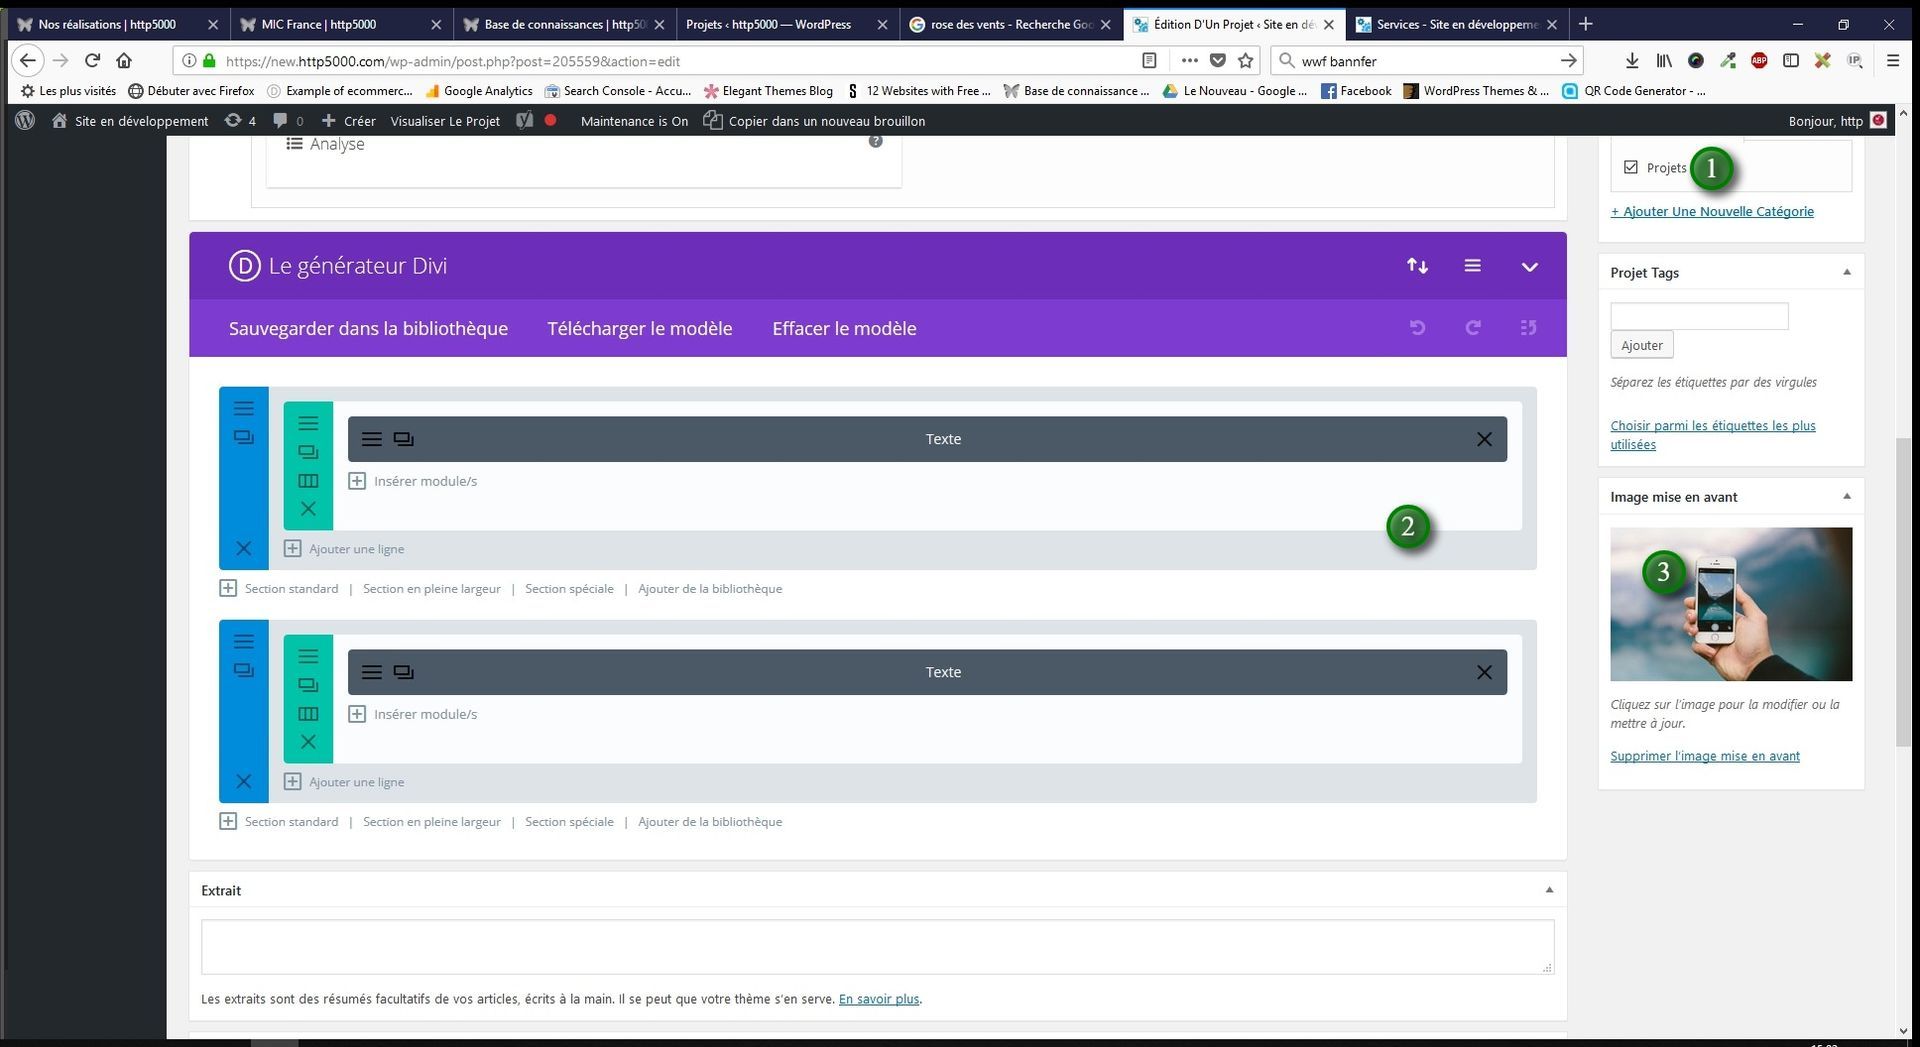
1/ Project category: on your website, you can create several categories for your projects. Tick the correct category first, then on the page of your choice you can select which category to display in the Portfolio module.
2/ Featured image: this is the thumbnail shown in preview. It is recommended not to use an image that is too small (160×160px was the maximum), which is bad for SEO, or too large (do not exceed 52 KB in file size and 1024 px in dimension).
Reserve large images (which should also not exceed 1500px) for backgrounds and panoramic shots.
3/ Same editing area as for pages.
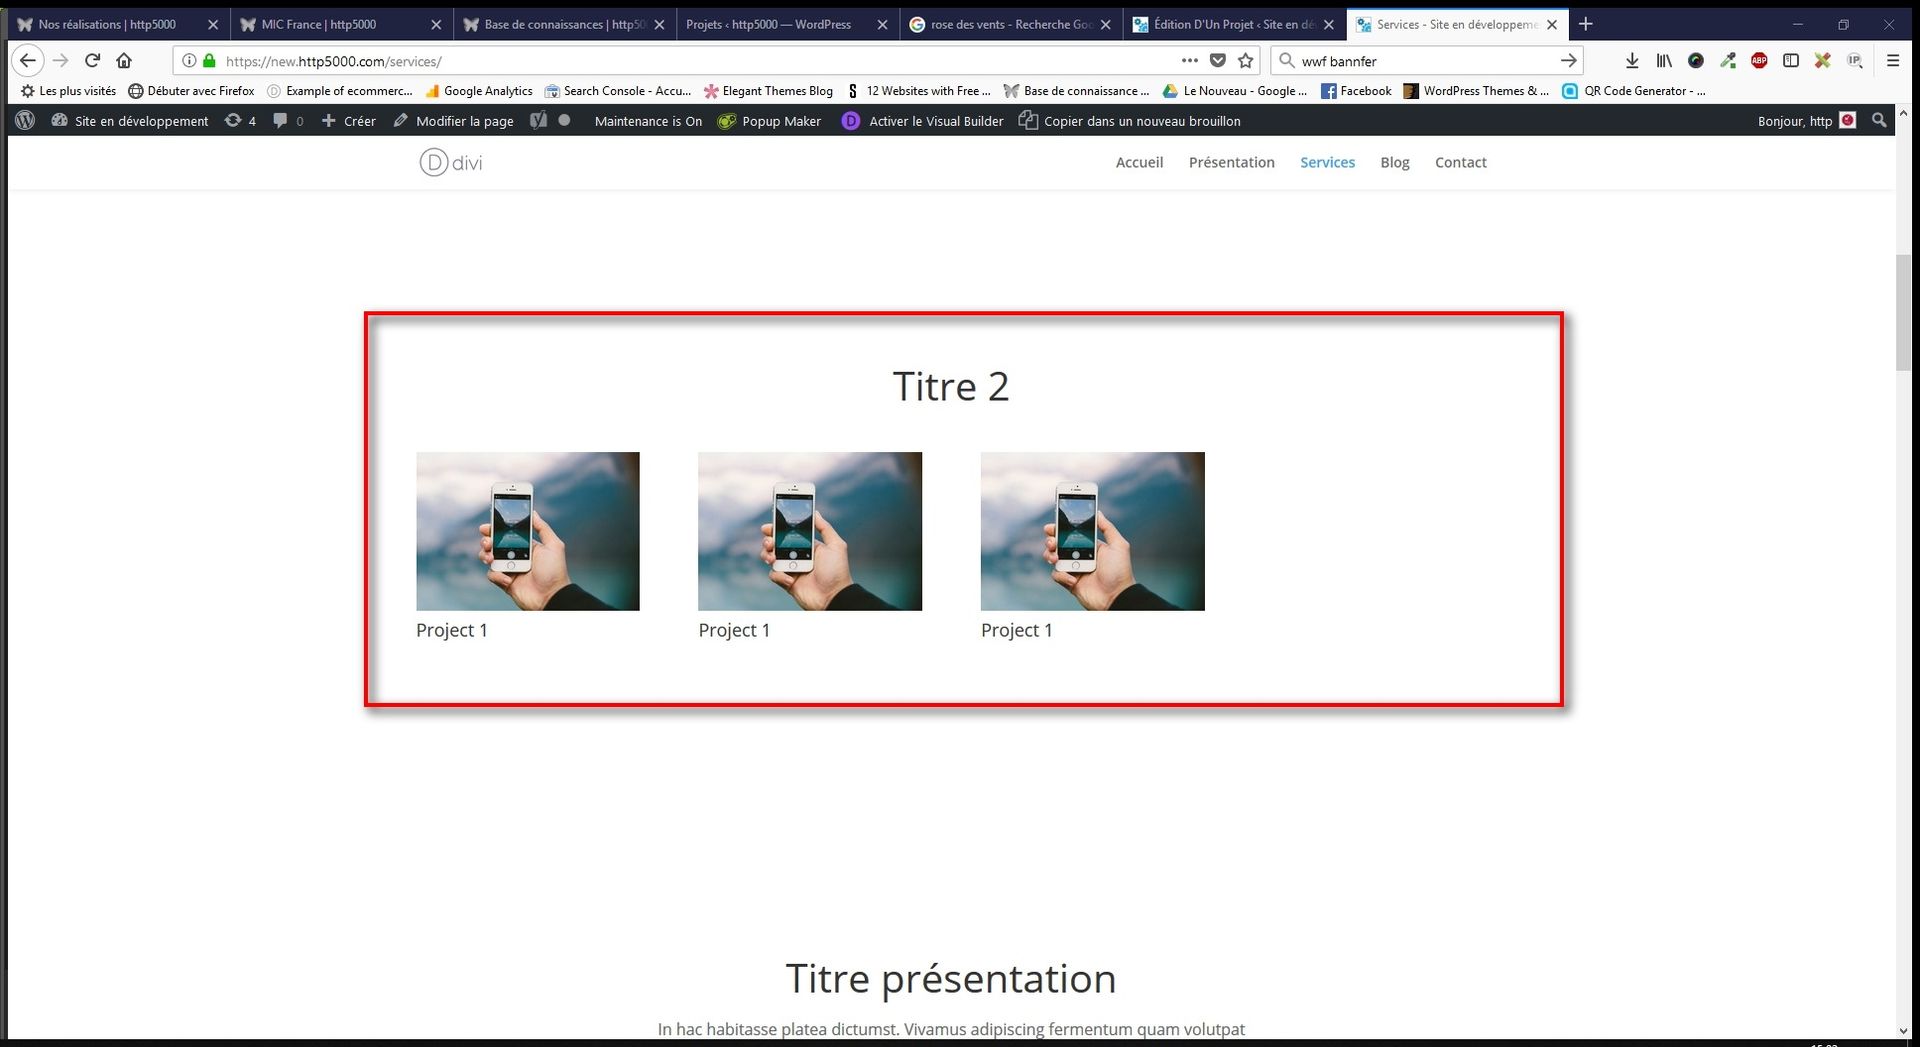
On the page of your choice, you can activate the Portfolio module and all your projects will be presented in "preview" format (just a title and an image).
As with the Blog module, you can choose to display certain categories.
YOU MAY ALSO LIKE
UGC, the future of marketing: How user-generated content can revolutionise your marketing strategy
by Yumea, 7 March 2023
UGC (User Generated Content) is changing the game in the world of marketing. With the rise of social media and content-sharing platforms, the … READ MORE
Category: News , Getting visible online , Social media
Comments: 0
How to use Instagram to reach your audience and drive traffic to your website?
by Yumea, 1 February 2023
Social media has become an indispensable tool for businesses looking to reach their target audience and drive traffic to their website. With more than 3.8 billion active users … READ MORE
Category: Getting visible online , Instagram , Social media
Comments: 0
7 Artificial Intelligence (AI) tools to know in 2023
by Yumea, 12 January 2023
In 2023, there are many websites that use artificial intelligence (AI) to help users write content and generate images. If you are looking for tools to help you write … READ MORE
Category: News
Comments: 0
Have a similar project?
Let's talk it over in 15 minutes. No sales pitch, just a technical chat.