Google Maps new terms: how to get your API key
In June 2016, Google announced that it would change the way users can add Google Maps to their website. Going forward, new users would need a Google Maps API key.
This means, for the time being at least, that existing Google Maps users are not affected by this change. Maps already embedded on your sites will continue to work. How long that remains the case is another matter. We recommend staying prepared for any future changes and getting a Google Maps API key now.
If you have a new website, the question is straightforward: you need this API key if you want to include a map on your platform.
We will therefore explain step by step how to obtain an API key and add a Google map to your web page.
Getting a Google Maps API key
It is worth knowing that Google offers several types of API. The one we need here is called the "Google Maps JavaScript API".
It is also worth noting that this API key comes in two tiers: Standard and Premium. Most people will opt for the Standard version, which allows 25,000 maps to be loaded for free per day. Beyond that, you pay $0.50 for every 1,000 additional views, up to 100,000 views per day.
If you are fortunate enough to generate traffic that exceeds these limits, you can learn more here about the Premium version.
With that said, let us now move on to obtaining the API key itself.
The first step is to acquire the key. For that, you obviously need a Google account.
On the Google page "Get a key for the JavaScript API" (click here), click the blue "Get a key" button.

This will open a new window where you can name your project. You will need to accept the terms of use.
Google will generate your API key. Copy and paste this generated code into a separate file and save it, for safety.
Protecting your Google Maps API key
You then need to ensure the security of your new application.
Go to the Google Console (the button is just below your key code).
A new window opens.
Here you can restrict the use of your API key to your own site. This means that no other unauthorised user will be able to copy your key and include it on their own site (consuming your view count, bringing it closer to the daily limit and costing you dearly in the long run).
Protecting your key is extremely straightforward. In the new window, find the "Key restriction" section.

If you want to make your map accessible on your WordPress site, select the "HTTP referrers (websites)" option.
This will open a new section where you can add your domain name.

Make sure you enter it in the correct format (i.e. .example.com/). The asterisks, slashes and dots must be written in exactly this way.
To use this API key across several different pages, you can add as many additional lines as needed.
Each time you finish entering a domain name, the next line appears automatically.

Finally, once the fields are filled in, click the "Create" button.
You then need to wait a few moments for the changes to take effect. You can then use your newly created API key to add a Google map to your site.
Adding an interactive map to your Divi site with your Google Maps API key
Now that your API key is ready, it is time to use it.
We will explain in detail how to include it on a WordPress site using the Divi plugin. It is remarkably straightforward.
You simply need to go to your site's administration page, then to Divi > Theme Options. On the page that opens, stay on the "General" tab and scroll down until you find the "Google API Key" field.

In that field, paste the API key you copied from the Google API Manager.
Then scroll to the very bottom of the page and click "Save Changes".
A loading indicator and a green arrow icon will confirm that the changes have been saved.
Using the Divi Builder
To see how to use the Divi Builder to include your map on your site, here are a few simple additional steps to follow, by way of example.
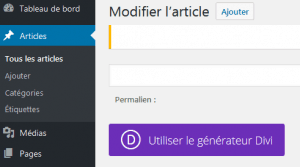
In your left-hand menu, click "Posts > Add New".
On the new page that appears, click the purple "Use Divi Builder" button.
Next, insert a column and click "Insert Module".

A list of modules appears — click "Map".

You can now begin configuring your map.
Start by specifying where the centre point of the map should be. You can then place an unlimited number of pins on it by clicking "Add New Pin". For each new pin, you will be asked to specify a physical location.

When a visitor hovers over a pin, a small pop-up will appear with information about the relevant location.
You can of course choose what information to display there. You can even add an image of the location to your pin.
When you have finished with a pinned location, click "Save".
You will be taken back to the main "Map Module Settings" panel.
On this panel, you can still adjust certain options — in particular, enabling scroll-wheel zoom on the map or adapting the map to various formats (to make it readable on mobile phones).
Once finished, click "Save & Exit".
You can then publish your post. The map you configured will be displayed on it.
New rules that are quite straightforward
Despite these changes to the way Google Maps is used — which may have unsettled more than a few people — this quick tutorial shows that it is fortunately very easy to adapt to the new landscape.
The steps for creating a key in the Google Manager and setting it up in the WordPress Divi module are quite intuitive.
(Translation: elegantthemes.com)
Have a similar project?
Let's talk it over in 15 minutes. No sales pitch, just a technical chat.