Create Your Own Font for Your Website in 6 Easy Steps
Many websites, such as Google Fonts, offer hundreds of typefaces. The choice is vast — and that is an understatement!
Even so, there are many reasons why you might not want to use a font that someone else has designed.
Discover how to create your own font.
Why create your own font?
It is worth knowing that creating a font can be very technical, time-consuming, and costly. The intended use for your font will help you calculate how much time and money you can invest in designing it.
If it is simply for fun or to experiment, digital handwriting converters may be perfectly sufficient. These are pieces of software that "translate" text written in Word into a handwritten form, giving it the appearance of a handwritten message rather than something typed on a machine.
If you need a font for a specific project, you may wish to take the time to learn the basic techniques and use slightly more complex software. That is the category we will focus on here.
Finally, if you plan to create a font in order to make it available to others, you will probably need to invest considerably more time in the process — and above all, invest in professional software.
Essential tools to get started
Before beginning this tutorial, let us look at a few basic tools.
- PaintFont (Free): this service allows you to transform handwriting into a font by filling in and scanning a template.
- FontStruct (Free): here you can create your own font using geometric shapes.
- FontSelf (Paid): this tool allows you to transform hand-drawn characters into a font via Adobe Illustrator. Coming soon to Adobe Photoshop.
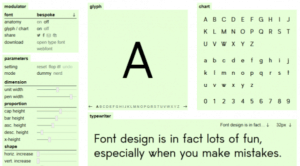
- Metaflop (Free): this tool allows you to customise basic fonts.
On to the tutorial itself!
Step 1: Define the specifications for your font
This is the most important step in the process. It is essential to have clearly defined your objectives.
A few questions to ask yourself:
- Will this font be for a specific project or a broader project?
- Will the application require a large or small text size?
- Do you want your font to be serif or sans-serif?
- Do you have certain fonts in mind that you could draw inspiration from?
Step 2: Start creating your font on paper
It may of course be tempting to jump straight to your software. But many professionals will advise you to start on paper. Trying to create the shapes you have in mind, faithful to your vision, can quickly become complicated and time-consuming on a computer. A pen and paper are generally far easier and faster to use.
A few useful tips for designing your letters on paper:
- You do not necessarily need to draw every letter of the alphabet; the recommended control characters are often "H", "n", "o", and "y".
- Draw the important guidelines to help you later.
- Look at other existing fonts to spot the recurring shapes from one letter to the next.
- Moving the page rather than your hand will allow you to create smoother curves.
Step 3: Choose and install your software
Many free software packages are available for designing a typeface. It is important to find the one you are most comfortable using, and that also has the features needed to achieve your goal.
- FontForge
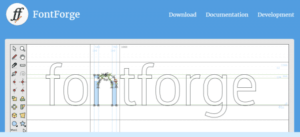
FontForge is an open-source digital font editor — free to use. It has extensive online documentation to help you get started (in English only).
Although the interface can look intimidating at first glance, once you are familiar with the software, FontForge becomes a powerful tool for creating beautiful fonts.
You can create your font from scratch or load images of fonts to use as a starting point.
- Birdfont
Birdfont is slightly more intuitive than FontForge. It may therefore be a better option for getting started with font creation.
As with FontForge, you can use the editor to do everything from scratch or load images as a starting point.
However, while tutorials are available online, they are not as detailed as those for FontForge.
Note that Birdfont is free for creating fonts under the SIL Open Font Licence. For commercial use of your font, the software requires a donation of €5.
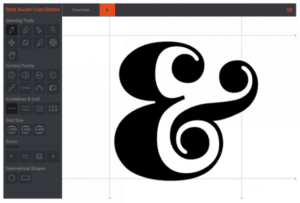
- Glyphr Studio
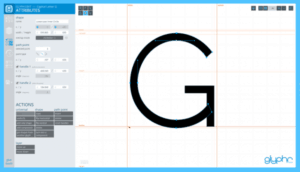
Whilst the two pieces of software already mentioned must be downloaded and installed on your computer, Glyphr Studio is an entirely online interface.
In terms of ease of use, Glyphr Studio sits between FontForge and Birdfont. Slightly more intuitive than FontForge, Glyphr Studio also has an aesthetically more pleasing interface design than the other two.
You will also find a great deal of information about Glyphr Studio online, though less than for FontForge.
In addition, while this tool does not allow you to load an image, you can load font files to edit them later.
Although these three tools offer similar options, the final choice comes down to personal preference. You can test two — or even all three — to see which one feels most accessible to you.
Step 4: Start creating
Once the software is installed, you are ready to create your font.
Depending on the software chosen, you can do everything yourself, load images of your hand-drawn strokes as starting points, or load a font file to edit.
Once your control characters are designed, you can extend your font to the remaining letters, numbers, and special characters.
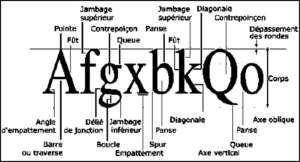
This step can take quite a long time as you find your feet and get used to the software. But practice will soon allow you to speed up the process. To help you, here are a few technical terms you absolutely need to know:
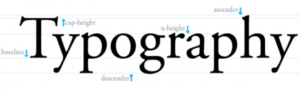
- Glyph: any typographic sign (character or accent) is considered a glyph
- Baseline: the invisible line on which all characters sit (and below which letter descenders — such as the tail of a "p" — extend)
- Descender: the part of certain letters (such as p or y) that extends below the baseline
- Stem: the principal vertical stroke of a character, such as T or L. It can also be diagonal, in which case it is called a "diagonal"
- Bowl: the closed, rounded part of certain letters such as a or d
- Bézier curve: a mathematical paradigm used to design scalable curves
We are only scratching the surface of the subject here. For more visual learners, diagrams available online clearly illustrate the terms listed above.
Step 5: Refine the font as a whole
During the creation of individual characters, it is easy to focus solely on the letters one by one. However, it is equally important to consider how they will look as an ensemble.
Here are some tips for refining your characters:
- Pay attention to the spacing and kerning between letters; during the creation process, combine pairs of letters (A and V, for example) to check their spacing.
- Test many different sizes for each character.
- Print your work regularly throughout the creation process; seeing your creation on paper makes it easier to spot potential subtle errors.
At this point, you are almost there! The final step is approaching.
You have designed your font, chosen and mastered your software, transferred your paper font to digital format, and refined it to perfection.
All that remains is to use it online!
Step 6: Upload your font to WordPress
Once the work is done, you will naturally want to test your font.
If the goal was to use it on your WordPress website, many methods exist to do so. The simplest is to use a plugin — one of the most well-known for this purpose being Use Any Font.
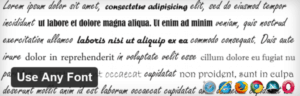
This plugin automatically converts your files, extracts the CSS code, and encodes it into your theme files. Your font will then be accessible like any other typeface in WordPress.
This plugin works with .ttf, .otf, and .woff extensions. It is free for the conversion of a single font. For €10 or more, you can convert an unlimited number of fonts.
If you would rather not use a plugin, another option is to add your font directly in your own CSS code.
First, you will need to use a generator such as Font Squirrel or Transfonter to obtain the necessary code.
You can then add this code to the theme's stylesheet file, named style.css. For more precise guidance on this approach, many tutorials online will walk you through it step by step.
Tools for professionals
Finally, if you wish to go a little further in font creation and are looking to create typefaces for other uses, a wealth of more comprehensive tools awaits you.
FontLab Studio, FontCreator, Glyphs, and Robofont are some of the most popular options used by professional typographers.
(Freely translated from Elegantthemes)
Have a similar project?
Let's talk it over in 15 minutes. No sales pitch, just a technical chat.